
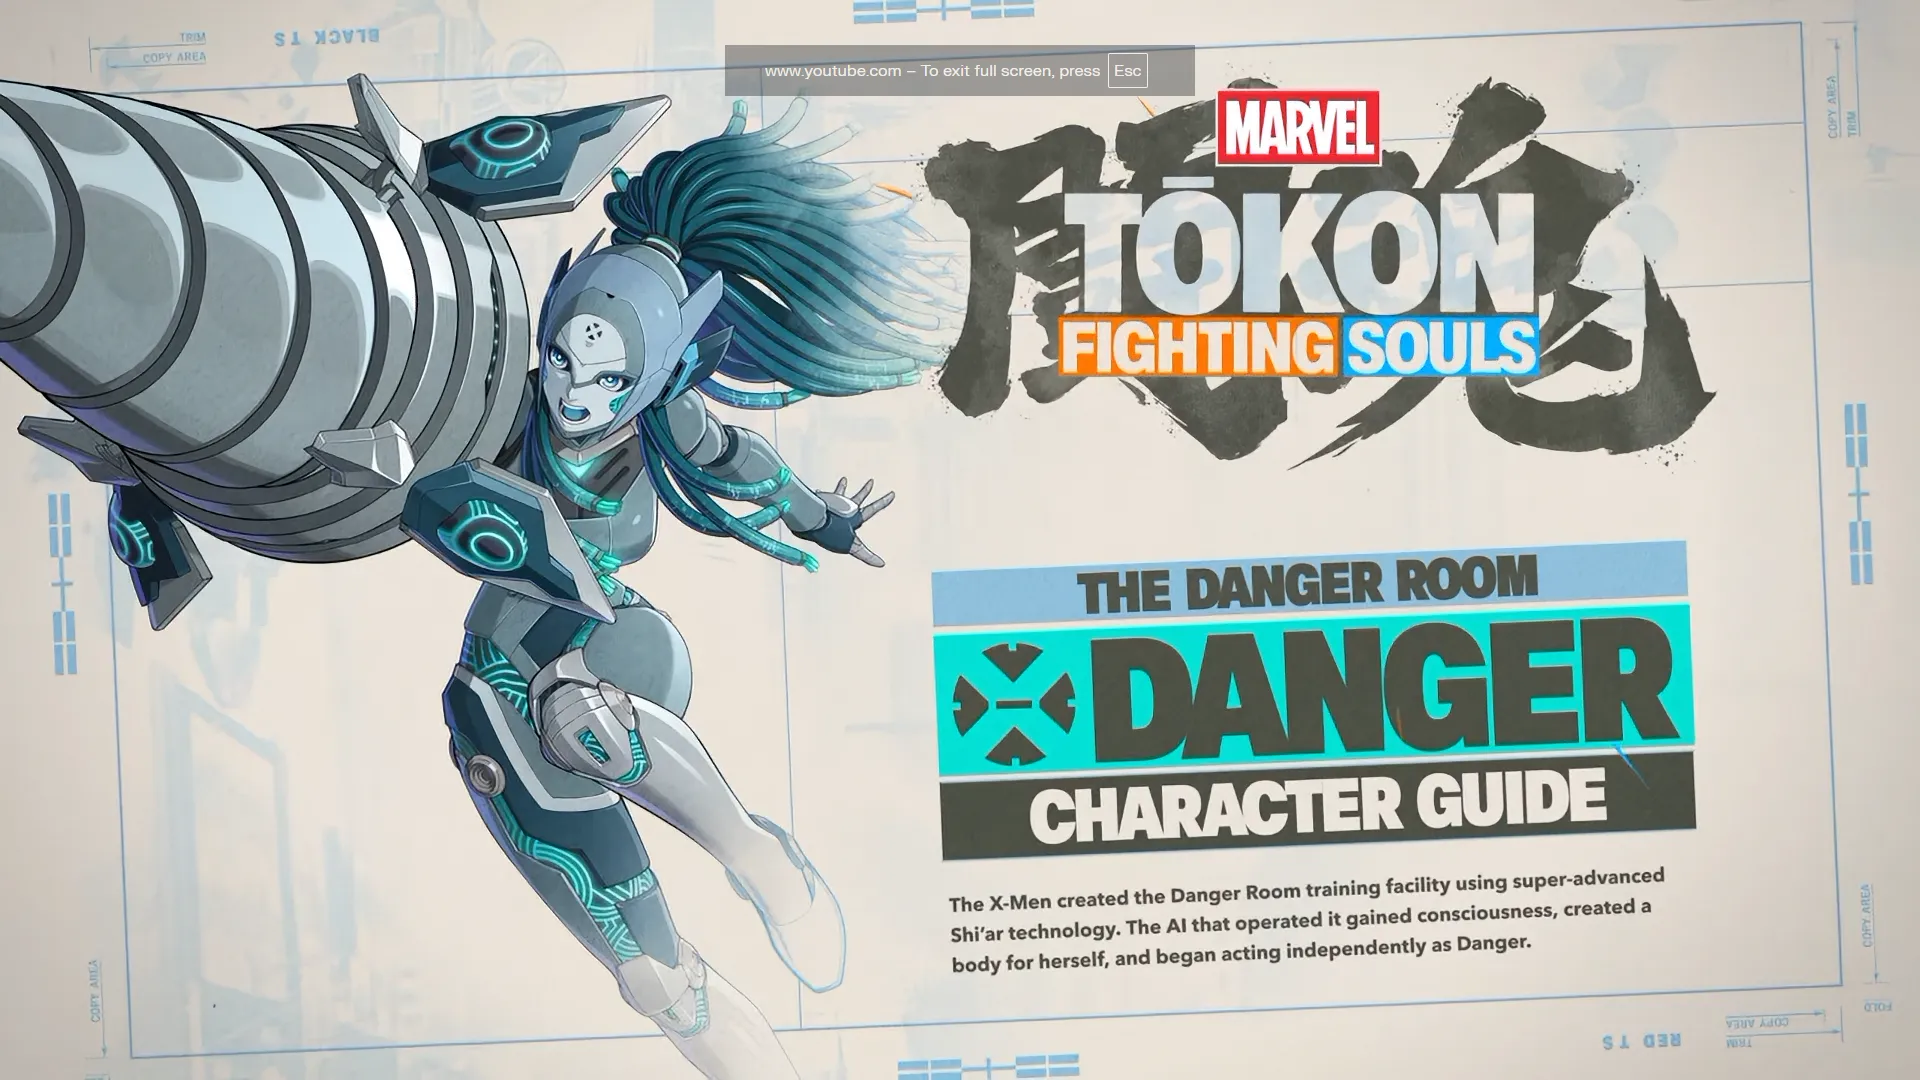
Danger Character Overview
Danger is one of the more technical characters in Marvel Tōkon: Fighting Souls. She's built around planning and stage control rather than straightforward rushdown, deploying Calibrate devices that enhance her special moves and open up teleport mix-ups from angles opponents don't expect.
Every device she places becomes another tool in her arsenal. HoloBeam can ricochet through Calibrate devices to attack from unexpected directions, HoloSeeker can detonate them for explosive pressure, and Translocation lets Danger instantly reposition across the screen. Once her setup is complete, opponents are left guessing where the next hit is coming from.
Her execution demands are higher than most of the current roster, but players willing to put in the time get one of the game's deepest playstyles. Her toolkit controls space, extends combos, and turns seemingly harmless situations into devastating damage.
She's best suited to players who enjoy methodical, trap-heavy play built around controlling neutral rather than overwhelming opponents with relentless offense.
In This Guide
- Character Profile
- Strengths & Weaknesses
- How Does Danger Play?
- Complete Move List
- Calibrate Guide
- HoloBeam Guide
- HoloSeeker Guide
- Drill Piercer Guide
- Kill Switch Guide
- Translocation Guide
- Synchro Beam Guide
- Metamorphosis Guide
- Assist Guide
- Beginner Gameplan
- Advanced Tips
- Is Danger Good?
- FAQ
- Final Verdict
Danger Character Profile
| Attribute | Details |
|---|---|
| Affiliation | Unbreakable X-Men |
| Ease of Use | ★★☆☆☆ |
| Archetype | Setup / Zoner / Technical |
| Playstyle | Space Control, Teleport Mix-ups, Device Setups |
| Recommended For | Intermediate and Advanced Players |
Danger Strengths and Weaknesses
Strengths
- Excellent screen control using Calibrate devices.
- Highly versatile projectile game.
- Powerful teleport mix-ups that keep opponents guessing.
- Strong combo extensions with multiple routing options.
- Great assist utility for team-based strategies.
- Ultimate Skill permanently empowers Drill Piercer for the remainder of the round.
- Exceptional long-range pressure.
Weaknesses
- Requires planning before reaching full potential.
- Steeper learning curve than most characters.
- Managing device placement is essential.
- Mistimed teleports can leave Danger vulnerable.
- Can struggle if opponents prevent her from establishing setups.
How Does Danger Play?
Danger thrives on preparation. Rather than rushing straight into close-range combat, she performs best by establishing Calibrate devices around the stage and forcing opponents to deal with a battlefield that keeps shifting in her favor.
Once her devices are active, nearly every part of her moveset gets more dangerous: projectiles gain new trajectories, explosions hit harder, and teleport options open up sequences that are tough to see coming. This rewards players who think a few moves ahead and read where both fighters are likely headed next.
She can deal solid damage on her own, but she really shines when the whole toolkit works together. Mastering her means learning how each special move interacts with Calibrate, knowing when to spend Skill Gauge, and controlling space well enough that opponents end up playing on her terms.
If you like setup characters with creative routing and strong battlefield control, Danger is one of the deepest characters currently in Marvel Tōkon: Fighting Souls.
Danger Move List
Below is the complete move list for Danger in Marvel Tōkon: Fighting Souls. Danger's toolkit revolves around the Calibrate mechanic, which enhances several of her special moves by placing devices around the battlefield. Learning when and where to deploy these devices is central to playing her well.
Inputs below assume Danger is facing right.
Normal Attacks
| Move | Input | Description |
|---|---|---|
| Light Attack | L | Fast normal attack used for pressure, confirms, and starting Link Attacks. |
| Medium Attack | M | Longer reach with improved combo potential. |
| Heavy Attack | H | Powerful strike that deals increased damage and launches in certain situations. |
| Crouching Attacks | ↓ + L / M / H | Low attacks with different combo applications. |
| Jumping Attacks | Air + L / M / H | Aerial normals for air-to-air combat and jump-ins. |
Link Attacks
| Move | Input | Description |
|---|---|---|
| Link Attack | L → L → L | Chains normal attacks together into a basic combo sequence. |
| Extended Link Attacks | Mix standing or crouching L, M and H attacks | Create longer combo strings by combining different normal attacks. |
Movement
| Move | Input | Description |
|---|---|---|
| Dash | Forward / Back + Dash | Quickly moves forward or backward. Holding the input extends the dash distance. |
Unique Skill
| Move | Input | Air OK | Description |
|---|---|---|---|
| Calibrate | U | Yes | Fires a projectile while deploying Calibrate devices. Other skills become stronger or gain new properties when interacting with deployed devices. |
Special Skills
| Move | Air OK | Skill Gauge | Description |
|---|---|---|---|
| HoloBeam | Yes | - | Fires an energy beam. Calibrate devices can redirect or repeat the beam. |
| HoloSeeker | Yes | Heavy Version: 25 | Launches a missile projectile. Devices explode when struck. |
| Drill Piercer | No | Heavy Version: 25 | Multi-hit drill attack that deals heavy damage and strong chip damage. |
| Kill Switch | No | Heavy Version: 25 | Lunging multi-hit attack with follow-up options and side-switch potential. |
| Translocation | No | Heavy Version: 25 | Teleports Danger to preset locations or active Calibrate devices. |
Super & Ultimate Skills
| Move | Skill Gauge | Description |
|---|---|---|
| Synchro Beam | 50 | Massive beam attack. Calibrate devices also fire beams when deployed. |
| Metamorphosis | 100 | Transforms Danger, empowering Drill Piercer until the end of the round. |
Tokon Assemble
| Move | Gauge Cost | Description |
|---|---|---|
| Tokon Assemble | 150 | An invincible cinematic team attack that can only be activated when losing the current round would end the match. |
Danger Unique Skill: Calibrate Guide
Calibrate sits at the center of Danger's entire moveset in Marvel Tōkon: Fighting Souls. Instead of acting like a traditional projectile, this Unique Skill deploys devices around the battlefield that enhance or completely change several of her Special Skills.
Almost every advanced strategy with Danger begins by establishing Calibrate devices. Once deployed, they redirect attacks, trigger extra projectiles, set up explosive traps, and act as teleport destinations. Managing them well is what separates simply using Danger's moves from mastering her full toolkit.
Unlike a lot of setup characters, Danger's devices stay active long enough to shape neutral, pressure, combo routes, and defensive positioning. That lets skilled players dictate the pace of a match while forcing opponents to respect multiple attack angles at once.
How Calibrate Works
Using Calibrate fires a small projectile while deploying a device onto the battlefield. Danger can establish multiple devices, letting her build increasingly threatening setups as the match progresses.
Once a device is active, several of Danger's Special Skills gain new properties: some attacks redirect through nearby devices, others detonate them for extra damage, and Translocation lets her teleport instantly to an active device for unexpected offense or defense.
Because every deployed device expands Danger's options, opponents are often forced to track both Danger herself and the position of every active Calibrate device.
Calibrate Properties
| Property | Details |
|---|---|
| Move Type | Unique Skill |
| Air Usable | Yes |
| Primary Function | Deploys enhancement devices |
| Supports | HoloBeam, HoloSeeker, Translocation, Synchro Beam and other setup interactions |
| Playstyle | Space Control / Setplay |
Why Calibrate Is So Important
Unlike characters whose strongest attacks are available from the start, Danger gets significantly stronger once Calibrate devices are on the field. Each additional device adds offensive options, letting her pressure opponents from multiple directions at once.
Several of Danger's strongest attacks either improve or gain entirely new functions through Calibrate, which makes device management one of the most important skills to learn when playing the character.
- Redirect HoloBeam through deployed devices.
- Cause HoloSeeker to detonate active devices.
- Teleport around the battlefield with Translocation.
- Increase Synchro Beam's coverage by firing additional beams from deployed devices.
- Create layered pressure that is difficult to predict or defend against.
Beginner Tips
- Don't rush to attack immediately. Establishing one or two Calibrate devices first gives Danger access to much stronger offensive options.
- Pay attention to where devices are placed. Their positions determine how several Special Skills behave.
- Use Calibrate throughout the round instead of placing every device in one location. Spreading them out increases your control over the stage.
- Remember that Translocation becomes much stronger once multiple devices are active, giving you unpredictable movement options.
- If you have enough Skill Gauge, combining Calibrate with Synchro Beam dramatically increases screen coverage and can punish opponents trying to escape.
Danger HoloBeam Guide
HoloBeam is Danger's main zoning tool in Marvel Tōkon: Fighting Souls. On its own it's a straightforward energy beam that controls space and keeps opponents at a safe distance, but its real strength shows up once it starts interacting with Calibrate devices, turning a simple projectile into one of Danger's most versatile offensive options.
Once Calibrate devices are active, HoloBeam can redirect through them for new attack angles, letting Danger pressure opponents from unexpected directions, cover escape routes, and hold screen control without committing to close-range combat.
Whether you're controlling neutral, extending pressure, or forcing an opponent into a defensive position, HoloBeam is a move you'll use throughout every match.
HoloBeam Overview
| Property | Details |
|---|---|
| Move Type | Special Skill |
| Air Usable | Yes |
| Skill Gauge Cost | None (Light & Medium) |
| Primary Role | Projectile / Space Control |
| Best Used For | Neutral, pressure, controlling movement, setting up Calibrate interactions |
How HoloBeam Works
Without any Calibrate devices on the battlefield, HoloBeam is a reliable horizontal projectile that lets Danger challenge opponents from a distance while buying room to set up her next device.
Once Calibrate devices have been deployed, HoloBeam changes a lot. Instead of travelling a single path, the beam redirects through nearby devices, opening extra firing angles that are much harder for opponents to dodge.
That interaction turns HoloBeam from a standard zoning tool into a pressure option that covers several areas of the screen at once.
HoloBeam + Calibrate
Calibrate is what turns HoloBeam from a basic projectile into one of Danger's signature attacks.
- Active Calibrate devices redirect HoloBeam, allowing it to strike from unexpected angles.
- Multiple deployed devices increase the number of possible attack paths, making it much harder for opponents to predict where the beam will travel.
- Strategically placed devices can pressure opponents attempting to jump, retreat, or approach from different directions.
- Well-positioned Calibrate devices allow Danger to maintain offensive pressure while remaining at a safe distance.
Because HoloBeam gets stronger with proper setup, experienced Danger players usually establish one or two Calibrate devices before leaning heavily on projectile pressure.
Best Uses
- Control neutral from a safe distance.
- Force opponents to block while establishing additional Calibrate devices.
- Punish predictable movement across the screen.
- Apply layered pressure once multiple devices are active.
- Control space before attempting a teleport mix-up with Translocation.
- Support teammates by limiting the opponent's movement during Member Switch pressure.
Strengths & Weaknesses
Strengths
- Excellent long-range projectile.
- Becomes significantly stronger with Calibrate.
- Controls multiple areas of the screen.
- Safe way to pressure from range.
- Supports Danger's overall space-control gameplan.
Weaknesses
- Less threatening without Calibrate devices.
- Requires planning to maximize effectiveness.
- Predictable if used repeatedly from the same position.
- Most effective when combined with the rest of Danger's toolkit.
Pro Tips
- HoloBeam isn't just a projectile. It's a way to control where your opponent can safely move.
- Try to establish Calibrate devices before relying heavily on HoloBeam. The additional firing angles dramatically increase its effectiveness.
- Mix HoloBeam with Translocation to create difficult-to-read offensive sequences.
- If opponents become focused on avoiding redirected beams, use that hesitation to safely deploy another Calibrate device.
- During longer rounds, HoloBeam becomes progressively more threatening as your battlefield setup expands.
Danger HoloSeeker Guide
HoloSeeker is one of Danger's most versatile Special Skills in Marvel Tōkon: Fighting Souls. It works as a projectile on its own, but its real strength comes from Calibrate, letting Danger detonate deployed devices and create explosive pressure across the battlefield.
Unlike HoloBeam, which controls space through beam trajectories, HoloSeeker threatens opponents by turning existing Calibrate setups into damaging traps. That makes it a strong tool for controlling movement and making opponents think twice before approaching Danger.
Whether you're zoning from full screen or applying pressure after establishing devices, HoloSeeker adds another dangerous layer to Danger's already flexible gameplan.
HoloSeeker Overview
| Property | Details |
|---|---|
| Move Type | Special Skill |
| Air Usable | Yes |
| Skill Gauge Cost | Heavy Version: 25 Skill Gauge |
| Primary Role | Projectile / Trap Activation |
| Best Used For | Space control, pressure, detonating Calibrate devices and combo extensions |
How HoloSeeker Works
HoloSeeker launches a tracking projectile toward the opponent, giving Danger another reliable ranged option during neutral. On its own, it's useful for controlling movement and pushing opponents to block or reposition.
It gets considerably more threatening once Calibrate devices are deployed. If HoloSeeker hits an active device, it triggers an explosion that adds damage and extends Danger's offensive reach.
That interaction lets Danger threaten parts of the stage she couldn't otherwise cover, which makes HoloSeeker a strong follow-up once battlefield control is established.
HoloSeeker + Calibrate
Calibrate turns HoloSeeker into one of Danger's strongest setup tools.
- Active Calibrate devices explode when struck by HoloSeeker.
- These explosions allow Danger to threaten multiple parts of the screen without needing to stand nearby.
- Opponents must constantly account for both the incoming projectile and any nearby devices.
- Well-placed Calibrate devices can force opponents into difficult defensive situations, especially near the corner.
Rather than firing HoloSeeker whenever it's available, experienced players often wait until one or more Calibrate devices are established to maximize its pressure.
Light, Medium & Heavy Versions
Like several of Danger's Special Skills, HoloSeeker changes depending on the strength of the input used.
- Light Version: Fast projectile that can be used frequently to establish ranged pressure.
- Medium Version: Offers improved positioning and pressure while maintaining solid utility.
- Heavy Version: Costs 25 Skill Gauge but provides stronger offensive potential, making it ideal for punishing opponents or extending pressure after Calibrate has been established.
The Heavy version is often worth the additional Skill Gauge when it lets Danger convert a successful setup into meaningful damage or maintain momentum.
Best Uses
- Force opponents to move or block during neutral.
- Trigger Calibrate device explosions.
- Create layered projectile pressure.
- Control the corner with explosive setups.
- Cover teleports initiated through Translocation.
- Extend offensive pressure after successful knockdowns.
Strengths & Weaknesses
Strengths
- Reliable ranged projectile.
- Excellent synergy with Calibrate.
- Creates explosive pressure across the stage.
- Useful for maintaining screen control.
- Strong offensive tool once setups are established.
Weaknesses
- Less threatening without active Calibrate devices.
- Requires planning to maximize damage.
- Heavy version consumes Skill Gauge.
- Most effective when incorporated into Danger's overall setup game.
Pro Tips
- HoloSeeker works best as a way to activate your battlefield, not just another projectile.
- Place Calibrate devices where opponents naturally want to move before using HoloSeeker.
- Alternate between HoloBeam and HoloSeeker to make your zoning patterns less predictable.
- If opponents begin respecting your explosive setups, use the opportunity to reposition with Translocation or establish another Calibrate device.
- Don't spend Skill Gauge on the Heavy version unless you're confident it will improve your pressure, extend a combo, or secure meaningful damage.
Danger Drill Piercer Guide
Drill Piercer is Danger's main close-range Special Skill in Marvel Tōkon: Fighting Souls. Where HoloBeam and HoloSeeker are built for controlling space at a distance, Drill Piercer is about converting openings into damage through a powerful multi-hit attack.
It gets even more threatening after Danger activates her Ultimate Skill, Metamorphosis, which permanently enhances Drill Piercer for the rest of the round. That makes it one of the few attacks in the game that keeps getting stronger as a match goes on.
Whether you're punishing unsafe attacks, ending combos, or applying close-range pressure, Drill Piercer is one of Danger's most reliable finishers.
Drill Piercer Overview
| Property | Details |
|---|---|
| Move Type | Special Skill |
| Air Usable | No |
| Skill Gauge Cost | Heavy Version: 25 Skill Gauge |
| Primary Role | Damage / Combo Ender / Pressure |
| Best Used For | Punishing mistakes, ending combos and applying close-range pressure |
How Drill Piercer Works
Drill Piercer launches Danger forward in a rapid multi-hit attack that deals solid damage while keeping offensive momentum. Because the move covers ground quickly, it works well after confirming a successful hit or punishing an opponent's unsafe action.
The attack also inflicts considerable chip damage, making it useful even against blocking opponents. It shouldn't be thrown out carelessly, but Drill Piercer becomes a constant threat once Danger has conditioned opponents to respect her zoning and setup tools.
Its straightforward design makes it one of the easier Special Skills to work into Danger's gameplan, but understanding when to commit is what separates experienced players from beginners.
Light, Medium & Heavy Versions
Drill Piercer features three strength variations, allowing players to adapt the move to different situations.
- Light Version: Fastest startup and useful for quick punish opportunities.
- Medium Version: Offers a balanced combination of range and damage.
- Heavy Version: Consumes 25 Skill Gauge in exchange for improved damage and stronger offensive pressure.
The Heavy version is particularly effective when used to close out longer combos or punish large openings where maximum damage is available.
Best Uses
- End grounded combo strings.
- Punish unsafe attacks.
- Apply chip damage against defensive opponents.
- Capitalize on openings created by HoloBeam or HoloSeeker pressure.
- Force opponents to respect Danger's close-range offense.
- Take advantage of the permanent enhancement granted by Metamorphosis.
Drill Piercer + Metamorphosis
Drill Piercer becomes significantly more dangerous after activating Danger's Ultimate Skill, Metamorphosis. Once transformed, the move receives a permanent enhancement that lasts until the round ends.
This mechanic encourages players to think carefully about when to spend 100 Skill Gauge. Activating Metamorphosis early in a long round gives Danger more opportunities to benefit from the upgraded Drill Piercer, while saving it for later can provide a powerful finishing tool when a comeback is needed.
Managing this resource effectively is one of the defining skills of experienced Danger players.
Strengths & Weaknesses
Strengths
- Excellent combo finisher.
- Strong close-range damage.
- Inflicts meaningful chip damage.
- Benefits permanently from Metamorphosis.
- Simple to incorporate into most offensive sequences.
Weaknesses
- Ground-only Special Skill.
- Requires commitment if blocked.
- Heavy version consumes Skill Gauge.
- Most rewarding after successful confirms rather than random use.
Pro Tips
- Use Drill Piercer as the reward for winning neutral, not as the tool for winning it.
- Confirm your hits before committing whenever possible, especially against experienced opponents.
- If you've already activated Metamorphosis, look for more opportunities to end combos with Drill Piercer and maximize the permanent buff.
- Alternate between projectile pressure and sudden close-range Drill Piercer punishes to keep opponents uncomfortable.
- Don't overlook the move's chip damage. Even blocked Drill Piercers help wear down defensive opponents over the course of a round.
Danger Kill Switch Guide
Kill Switch is Danger's most aggressive Special Skill in Marvel Tōkon: Fighting Souls. Unlike her projectile-focused attacks, it closes the distance fast with a rushing multi-hit strike that keeps opponents under pressure and opens up follow-up attacks.
What makes Kill Switch unique is flexibility. Depending on the version used, Danger can keep attacking, reposition herself, or transition straight into Link Attacks to extend her offense. That makes it more than a simple combo ender. It's an important pressure tool that helps maintain momentum once Danger successfully gets in.
Danger is built for controlling space from long range, but Kill Switch shows she can capitalize on close-range openings just as well when the opportunity comes up.
Kill Switch Overview
| Property | Details |
|---|---|
| Move Type | Special Skill |
| Air Usable | No |
| Skill Gauge Cost | Heavy Version: 25 Skill Gauge |
| Primary Role | Pressure / Combo Extension / Repositioning |
| Best Used For | Maintaining offense, extending combos and closing the distance |
How Kill Switch Works
Kill Switch sends Danger rushing toward the opponent with a rapid multi-hit attack that excels at maintaining offensive momentum. Unlike Drill Piercer, which primarily rewards confirmed openings with damage, Kill Switch focuses on keeping pressure alive and giving Danger additional ways to continue attacking.
Several versions of the move include follow-up options that alter Danger's positioning, allowing her to remain close to the opponent or create new offensive angles. This flexibility makes Kill Switch one of the most dynamic Special Skills in her arsenal.
Because the move naturally flows into further attacks, it works especially well after conditioning opponents with Danger's long-range tools.
Light, Medium & Heavy Versions
Kill Switch offers multiple strength variations, each suited to different situations during a match.
- Light Version: Reliable for maintaining pressure after close-range confirms.
- Medium Version: Offers improved reach and combo flexibility while preserving offensive momentum.
- Heavy Version: Consumes 25 Skill Gauge and provides the strongest offensive reward, making it ideal after successful hit confirms or extended combo routes.
Choosing the correct version depends on spacing, available Skill Gauge, and whether your priority is damage, positioning, or continuing pressure.
Follow-Up Options
One of Kill Switch's defining strengths is its ability to transition into additional attacks rather than ending Danger's offense immediately.
- Continue pressure with its built-in follow-up attack.
- Transition into Link Attacks to extend combo sequences.
- Adjust positioning depending on the version used.
- Maintain offensive momentum after forcing the opponent to block.
This versatility makes Kill Switch much less predictable than a traditional rushing Special Skill and rewards players who understand when to continue pressure versus when to safely disengage.
Best Uses
- Maintain close-range pressure.
- Extend grounded combo strings.
- Punish opponents after successful hit confirms.
- Transition into Link Attacks for additional damage.
- Close the distance after conditioning opponents with projectiles.
- Force defenders to guess between continuing pressure and repositioning.
Strengths & Weaknesses
Strengths
- Excellent pressure tool.
- Natural combo extender.
- Built-in follow-up options.
- Helps Danger transition from zoning into offense.
- Strong synergy with Link Attacks.
Weaknesses
- Ground-only Special Skill.
- Requires commitment at close range.
- Heavy version consumes Skill Gauge.
- Can become predictable if used repeatedly without mixing in other options.
Pro Tips
- Use Kill Switch after your zoning tools have convinced opponents to play defensively. It becomes much harder to react to when they're already expecting projectiles.
- Don't always finish the same follow-up. Vary your routes to make your pressure less predictable.
- Take advantage of its ability to transition into Link Attacks instead of treating it as the end of your combo.
- Manage your Skill Gauge carefully. The Heavy version is strongest when it leads to additional damage or sustained pressure rather than being used in isolation.
- Danger is at her strongest when alternating between long-range control and sudden close-range offense. Kill Switch is one of the best tools for making that transition seamless.
Danger Translocation Guide
Translocation is the move that ties Danger's whole toolkit together in Marvel Tōkon: Fighting Souls. Most teleport abilities just reposition a character, but Translocation gets dramatically more powerful combined with Calibrate devices, letting Danger appear instantly at strategic locations across the battlefield.
It turns every deployed Calibrate device into a potential teleport destination, so opponents constantly have to account for Danger's positioning. Combined with her projectile pressure and setup tools, that makes for unpredictable mix-ups that are genuinely hard to defend against.
Whether you're escaping pressure, creating offense, or repositioning for another setup, Translocation is essential to playing Danger at a high level.
Translocation Overview
| Property | Details |
|---|---|
| Move Type | Special Skill |
| Air Usable | No |
| Skill Gauge Cost | Heavy Version: 25 Skill Gauge |
| Primary Role | Mobility / Mix-ups / Repositioning |
| Best Used For | Teleporting, escaping pressure, creating offense and extending setups |
How Translocation Works
Without Calibrate devices, Translocation provides useful repositioning options that help Danger reset spacing or begin another offensive sequence. Once Calibrate devices have been deployed, however, the move becomes significantly more threatening, letting Danger instantly teleport to those active devices.
This creates constant uncertainty for opponents. A seemingly safe position can become dangerous the moment Danger teleports behind them, while projectile pressure can quickly transition into close-range offense without warning.
Best Uses
- Escape corner pressure.
- Teleport behind opponents.
- Continue pressure after projectile zoning.
- Punish opponents focused on Calibrate devices.
- Rapidly reposition during neutral.
- Create unpredictable mix-ups.
Pro Tips
- Don't teleport just because you can. Make opponents worry about the possibility first.
- Mix projectile pressure with delayed teleports.
- Spread Calibrate devices across the stage instead of clustering them together.
- Use teleports to maintain pressure rather than constantly chasing damage.
- The threat of Translocation is often stronger than the move itself.
Danger Synchro Beam Guide
Synchro Beam is Danger's Super Skill. It costs 50 Skill Gauge for a devastating energy beam across the battlefield, and it gets significantly stronger with Calibrate devices active, since every deployed device fires an additional beam.
Overview
- Costs 50 Skill Gauge.
- Massive fullscreen beam.
- Calibrate devices fire additional beams.
- Excellent combo finisher.
- Outstanding screen control.
When to Use Synchro Beam
- Finish high-damage combos.
- Punish unsafe attacks.
- Force opponents to respect fullscreen pressure.
- Capitalize on multiple active Calibrate devices.
- Try to establish Calibrate devices before spending 50 Skill Gauge.
- The additional beams dramatically improve coverage.
- Think of Synchro Beam as both a damage tool and a space-control tool.
Danger Metamorphosis Guide
Metamorphosis is Danger's Ultimate Skill and costs 100 Skill Gauge to activate. It doesn't deal immediate damage. Instead it permanently enhances Drill Piercer for the rest of the round, which rewards players thinking in terms of long-term pressure rather than short-term burst damage.
Overview
- Costs 100 Skill Gauge.
- Permanently enhances Drill Piercer.
- Lasts until the end of the round.
- Encourages long-term resource management.
When Should You Activate Metamorphosis?
If the round is likely to continue for some time, activating Metamorphosis early gives Danger more opportunities to benefit from the enhanced Drill Piercer. In shorter rounds, saving the Skill Gauge for immediate damage through other options may prove more valuable.
- Think of Metamorphosis as an investment.
- The earlier you activate it, the more value you can potentially gain.
- Look for every opportunity to capitalize on the enhanced Drill Piercer afterward.
Danger Assist Guide
Danger has four Assist Skills that support a wide range of team compositions.
| Assist | Purpose |
|---|---|
| Vertical Assist | Controls aerial approaches and anti-air situations. |
| Assault Assist | Applies offensive pressure while allowing safe Member Switches. |
| Rush Assist | Extends combos and maintains offensive momentum. |
| Aerial Assist | Supports air combos and aerial pressure. |
Beginner Gameplan
- Establish one or two Calibrate devices.
- Control neutral using HoloBeam.
- Use HoloSeeker to activate device explosions.
- Teleport with Translocation when opponents become defensive.
- Convert openings into Drill Piercer.
- Finish with Synchro Beam whenever the opportunity presents itself.
Danger rewards patience. Rather than rushing toward the opponent, focus on building your battlefield before committing to offense.
Advanced Tips
- Always know where every Calibrate device is located.
- Condition opponents with projectiles before using Translocation.
- Don't become predictable with teleport timing.
- Save Heavy versions for situations where they'll secure meaningful damage or pressure.
- View Danger as a setup character first and a damage dealer second.
- Maintain screen control instead of constantly chasing the opponent.
Is Danger Good?
Danger is one of the most rewarding technical characters currently in Marvel Tōkon: Fighting Souls. Her space control, battlefield manipulation through Calibrate devices, and unpredictable teleport mix-ups give her one of the highest skill ceilings revealed so far.
New players will likely struggle with device management and positioning at first, but mastering her setup-focused playstyle pays off with exceptional screen control, creative combo routes, and flexible offensive options that few other characters can match.
Danger FAQ
Is Danger difficult to play?
Yes. Danger is currently rated two stars for Ease of Use, making her one of the more technical characters in the roster.
What is Calibrate?
Calibrate is Danger's Unique Skill that deploys devices around the battlefield, enhancing several of her Special Skills and enabling powerful teleport mix-ups.
Does Danger have teleport abilities?
Yes. Translocation allows Danger to reposition and teleport to active Calibrate devices.
What is Danger's Ultimate Skill?
Metamorphosis permanently enhances Drill Piercer until the end of the current round.
Is Danger beginner friendly?
Not particularly. She rewards planning, positioning and setup management, which makes her better suited to players who enjoy technical characters.
Final Verdict
Danger is one of the most creative and strategically rewarding fighters in Marvel Tōkon: Fighting Souls. Her combination of Calibrate devices, projectile control, explosive setups and teleport mix-ups makes for a playstyle unlike any other character revealed so far.
She demands patience and practice, but the payoff is real. Players who enjoy controlling the pace of a match, planning several moves ahead and keeping opponents guessing will find her an excellent choice.
As the roster grows, Danger already looks like one of the game's premier setup specialists, with plenty of depth for players willing to put in the time to master her.
Note: This guide hub is updated as Arc System Works reveals new characters, mechanics, and gameplay details. We'll keep adding new guides as more character guides are revealed and extensive official information becomes available.
Explore more Marvel Tōkon: Fighting Souls character guides in our Marvel Tōkon Guide Hub.