

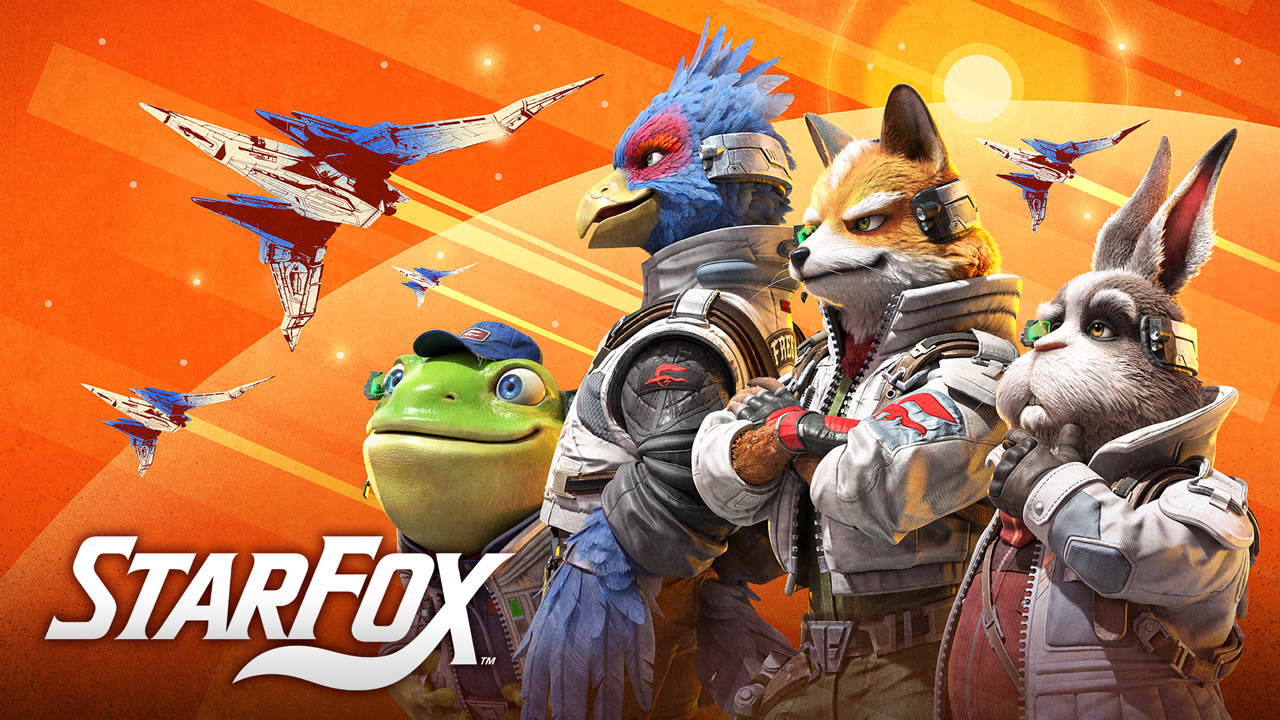
Bookmark this page and check back regularly. We'll continue updating this guide with new strategies, gameplay discoveries, route optimizations, known issues, fixes, and everything else worth knowing as the Star Fox community uncovers more.
Star Fox looks like a nostalgia trip until you die on Corneria for the third time and realize the old muscle memory isn't going to save you here. The remake keeps the bones of Star Fox 64 intact, but it moves faster, punishes sloppy piloting harder, and hides more of its best content behind objectives most players will fly straight past without noticing. You can absolutely finish the campaign in an evening without reading a word of strategy. You'll also miss Sector Y, never see Solar, and wonder why your Arwing never got past its starting laser color. None of that is fun, and none of it is necessary once you know what the game actually wants from you.
This guide is built around the stuff that actually changes how you play, not a stage-by-stage transcript of the campaign. We'll get into vehicle choice, why barrel rolling everything is a bad habit, how the medal system quietly gates half the game's content, and which settings you should flip before your first flight instead of your fifth.
Understanding the Core Gameplay Loop
Every mission in Star Fox follows roughly the same shape: you fly a fixed path (or a semi-open arena, depending on the stage type), enemies pour in from set spawn points, and you're scored on how much of the level you actually destroy rather than just how much of it you survive. That last part trips people up. Star Fox isn't asking you to dodge your way to the exit. It's asking you to clear house on the way there, because your hit count determines whether you walk away with a medal, and medals are the currency that unlocks everything worth unlocking.
Once that clicks, the whole game reframes itself. Turrets you'd normally ignore become free points. Asteroids you'd normally weave around become targets. The optional objectives scattered through each stage, saving Falco on Corneria, beating Star Wolf to the clock on Fichina, aren't side content bolted on for completionists. They're the actual game, and skipping them is closer to playing on a lower difficulty than playing the "real" campaign.
Controls and Movement Mechanics Worth Learning Immediately
The remake gives you more control options than the original ever did, which is great once you know what to pick and mildly overwhelming until then. A few of these are worth locking in before you fly your first mission rather than discovering them the hard way.
Barrel Roll is the move everyone remembers, and it's also the one new players lean on far too hard. Double-tapping a shoulder button sends your Arwing into a spin that deflects incoming lasers and missiles. It does nothing against terrain, capital ship hulls, or anything you physically collide with. We've watched more than one run end because someone panic-rolled straight into a canyon wall instead of just pulling up. Use it the moment you see a volley of enemy fire heading your way, not as a reflex every time the screen gets busy. Think of it as a shield with a very specific hitbox, not a dodge button.
Charged shots matter more than they look like they should. Holding the fire button builds up a blast that hits significantly harder and can chain through grouped enemies for bonus hits, which feeds directly into your medal count. Against a scattered pack of scouts, tap-firing is fine. Against anything clustered, and Star Fox loves to cluster enemies right before a checkpoint, a single charged shot will clear the group faster than three seconds of regular fire ever could.
The somersault deserves more attention than most players give it. Holding the somersault input flips Fox into a spinning, briefly invulnerable state that fires in all directions. It won't save you from a direct hit at point-blank range from something heavy, but it's an excellent panic button during boss phases where you're getting swarmed from multiple angles at once, and it's one of the few defensive tools that also does damage while it's active.
Before your first mission, we'd also flip on the aiming reticle if it's off by default in your build. Charged shots and homing lock-on both benefit from knowing exactly where your crosshair sits, especially once you switch into cockpit view, and there's no real downside to leaving it visible.
Every Vehicle Explained, and When to Use Each One
You don't build these ships the way you'd build a loadout in most modern shooters. There's no gear to swap or skill tree to invest in. What you get instead is three fixed vehicles, each suited to a completely different kind of stage, and the game will force your hand on which one you're flying based on the mission. Knowing their strengths ahead of time still matters, because it changes how aggressively you can play each one.
| Vehicle | Best For | Strengths | Weaknesses |
|---|---|---|---|
| Arwing | Air and space dogfights, most of the campaign | Fast, agile, barrel roll shield, full weapon upgrade path | Dies quickly without ring pickups to keep shields topped up |
| Landmaster | Ground assault stages like Corneria's train section and Titania | Heavy armor, strong base cannon with auto-lock, can strafe sideways | Slow, no barrel roll defense, locked to specific missions |
| Blue-Marine | Aquas, the game's only underwater stage | Unlimited homing torpedoes, EM shield from barrel rolling, tanky underwater | Sluggish handling, poor visibility without using torpedoes to light the way |
The Arwing is the one you'll spend most of your time in, and it's the only vehicle whose weapons actually scale as you play. Its laser cannon climbs from a basic green shot up through blue, twin, and eventually hyper, and each step up is a real jump in damage rather than a cosmetic change. The Landmaster trades all of that flexibility for raw stopping power. Its cannon hits harder than an unupgraded Arwing right out of the gate, but it never gets stronger no matter how many rings you grab, so lean on positioning and its side-strafe rather than expecting the weapon itself to carry you. The Blue-Marine is the odd one out, both because you'll barely use it and because its unlimited torpedo supply makes it feel almost generous by comparison. Treat every underwater encounter as a torpedo spam fest and you'll be fine.
Combat Strategies That Make the Biggest Difference
Star Fox's combat rewards players who think about crowd control instead of picking off targets one at a time. A basic scout goes down in a hit or two regardless of how you shoot it, so the real skill ceiling is in how efficiently you clear waves before they clear you.
Group enemies are your best friend once you understand charged shots. Any time you see three or four ships bunched together, and the game spawns these clusters constantly right before checkpoints, hold your fire button for a beat and let a charged blast take the whole group at once. It's faster than picking them off individually and it stacks your hit count for medal purposes far more efficiently.
Shielded enemies and the Flip Bots you'll meet in Meteo need a different read. Both only expose a weak point periodically, usually the back or underside, and both punish players who just spray fire at the front hoping for the best. Lock on when the opening appears and fire immediately. Trying to force damage through the shielded side wastes ammo and time you don't have during a busy wave.
Don't sleep on scenery and stationary hazards either. Turrets, satellites, crates, anything destructible counts toward your hit total, and ignoring them because they're not shooting back is leaving free medal progress on the table. If you've got a spare second between waves, spend it shooting something rather than coasting.
How Medals, Routes, and Progression Actually Work
This is the system most new players underestimate, and it's the difference between a five-hour playthrough that feels thin and a much richer one that actually shows off what the remake built. Each stage has a hidden hit quota. Clear enough targets and keep your wingmen alive, and you earn a medal for that mission. Medals aren't cosmetic. Earning at least one on every stage is what unlocks both Challenge Mode and the harder Expert campaign, so if you're chasing that difficulty spike, ignoring the medal system is the slowest way to get there.
Routes work on a separate but related track. The campaign map branches the same way it did on the Nintendo 64, and which path you take depends on completing specific objectives inside a stage rather than a menu choice between missions. Fly through all seven stone arches on Corneria and keep Falco alive, and you open a hidden route toward Sector Y instead of the default path. Beat Star Wolf to the clock on Fichina and Solar becomes available. Rack up a hundred hits on Sector Y and Aquas opens up. None of these are hinted at loudly in the moment, which is exactly why so many first-time players never see half the map.
If you're going for a full route guide style playthrough, the honest advice is to check the world map after every single stage. It shows which branches you've unlocked and which objectives you still need for the ones you haven't. Lower routes tend to be the more forgiving, beginner-friendly path through the campaign, while the upper branches demand stacking several optional objectives back to back, so treat your first run as a chance to learn the game rather than a race to see everything at once.
Secret Unlockables and Endgame Content
One of the biggest misconceptions about Star Fox is that reaching the credits means you've finished the game. In reality, the first successful run is closer to an introduction than a conclusion. The campaign is deliberately built around replayability, with alternate routes, hidden objectives, medals, tougher difficulties, and additional content encouraging players to revisit familiar stages with new goals in mind.
If your only objective is reaching Venom and defeating Andross, you'll likely see less than half of what the remake has to offer. Entire planets, boss encounters, dialogue sequences, and stage layouts remain hidden behind optional objectives that many first-time players never even realize exist. That's intentional. Nintendo has always designed Star Fox around experimentation, rewarding curiosity instead of placing every piece of content directly in front of the player.
The medal system sits at the center of that progression. Every stage contains a hidden score requirement based primarily on your hit count. Simply surviving a mission isn't enough. You're expected to actively destroy enemy formations, environmental hazards, turrets, missiles, and anything else that contributes toward your overall score. Protecting your wingmen is equally important, since losing teammates can prevent you from earning a medal even after reaching the required hit total.
Because medals unlock some of the game's most rewarding content, they quickly become the focus of later playthroughs. Rather than asking whether you can finish a level, the game begins asking how efficiently you can clear it. You'll find yourself replaying familiar missions to optimize your route, memorize enemy spawns, chain together charged shots, and squeeze every possible hit out of each encounter. It's a completely different experience from a first blind run, and it's where Star Fox's replay value really starts to shine.
Expert Mode is perhaps the most significant reward waiting for experienced players. While it follows the same overall campaign structure, it dramatically increases the challenge through more aggressive enemy behavior, harsher punishment for mistakes, and far less room for sloppy flying. Players who rely on constant barrel rolls or panic boosting often discover those habits stop working entirely once the difficulty increases. Expert Mode expects you to understand enemy attack patterns, manage your resources carefully, and consistently keep your wingmen alive throughout an entire campaign.
Challenge Mode builds on those same fundamentals by encouraging players to chase higher scores and cleaner runs rather than simply surviving. Every medal earned becomes another milestone toward fully mastering the game's mechanics. Veterans often spend dozens of additional hours perfecting routes they completed comfortably during their initial playthrough simply because they know there's still room for improvement.
The branching campaign itself offers another layer of replayability. Completing hidden objectives opens entirely different planets, meaning no single playthrough can show everything. Saving Falco during Corneria, beating Star Wolf within specific time limits, or reaching certain hit counts all influence where your journey continues next. Some routes lead to easier stages that help newer players learn the mechanics, while others immediately raise the difficulty in exchange for entirely different missions and boss fights.
For players interested in seeing absolutely everything, multiple campaign runs aren't optional, they're expected. Trying to unlock every route, every medal, and every secret in a single playthrough usually creates unnecessary frustration because many objectives naturally conflict with one another. A much better approach is treating each run as its own objective. One campaign can focus on discovering new routes, another on earning medals, and later runs can concentrate on tackling Expert Mode or improving overall score.
By the time you've completed several routes through the Lylat System, you'll start noticing how cleverly the game encourages experimentation. Enemy encounters become easier to anticipate, hidden objectives feel more obvious, and stages that once seemed difficult transform into opportunities to improve your medal count. That's the point where Star Fox evolves from a straightforward rail shooter into a game built around mastery.
| Unlockable | How to Unlock It | Why It's Worth Unlocking |
|---|---|---|
| Alternate Routes | Complete hidden objectives during individual missions. | Access new planets, bosses, dialogue, and mission layouts. |
| Challenge Mode | Earn medals across every campaign stage. | Provides additional replay value through score-focused gameplay. |
| Expert Mode | Meet the game's medal progression requirements. | Introduces a significantly tougher version of the campaign for experienced players. |
| 100% Completion | Explore every branching path while collecting medals and clearing every stage. | Allows you to experience everything the remake has to offer across multiple playthroughs. |
If you're wondering what your long-term goal should be after finishing the campaign for the first time, don't think of it as chasing a checklist. Instead, think of each completed run as another step toward mastering the game's systems. The developers clearly designed Star Fox with repeated playthroughs in mind, and many players consider their second or third campaign to be where the experience truly begins.
Best Campaign Routes for Different Playstyles
One of Star Fox's defining features is that there isn't a single "correct" way to complete the campaign. Every branching decision changes the stages, bosses, and challenges waiting ahead, making each playthrough feel slightly different from the last. Some routes are ideal for newcomers learning the mechanics, while others are designed for experienced players chasing medals, hidden objectives, or the highest possible scores.
If you're approaching the remake for the first time, don't worry about unlocking every secret planet immediately. The game was designed around repeated playthroughs, and trying to force every hidden objective into a single campaign often creates more frustration than enjoyment. Instead, focus on building confidence with the core mechanics before attempting the more demanding branches.
Best Route for Beginners
For a first playthrough, the safest approach is following the more forgiving lower route whenever possible. These stages introduce the game's mechanics at a comfortable pace while still giving you opportunities to upgrade your lasers, learn boss patterns, and understand how medals work without overwhelming you.
| Stage | Why It's Recommended |
|---|---|
| Corneria | Introduces every core mechanic and teaches formation combat. |
| Meteo | Excellent stage for practicing charged shots and asteroid navigation. |
| Fortuna | Introduces Star Wolf without placing excessive pressure on the player. |
| Macbeth | Provides valuable experience using the Landmaster. |
| Bolse | Tests everything learned before the final mission. |
| Venom | Final examination of the mechanics introduced throughout the campaign. |
This route offers a balanced learning experience without asking players to complete difficult hidden objectives under strict time limits. By the time you reach Venom, you'll have experienced each major vehicle and developed a solid understanding of the combat systems that carry into later playthroughs.
Best Route for Medal Hunting
Once you're comfortable with the basics, your priorities begin to change. Instead of simply reaching the end of each mission, you'll start thinking about maximizing hit counts, protecting your wingmen, and clearing every enemy formation before it leaves the screen. Certain stages naturally lend themselves to earning medals thanks to their large number of enemy waves and destructible objects.
When pursuing medals, patience becomes just as important as accuracy. Many players lose medal opportunities by boosting through quieter sections of a level, only to discover they skipped entire groups of enemies that counted toward the hidden score requirement. Slowing down slightly and clearing every available target usually produces far better results than racing toward the finish line.
It's also worth remembering that medals aren't earned purely through aggressive play. Keeping Falco, Slippy, and Peppy alive throughout a mission is equally important. If a wingman repeatedly calls for help, abandoning them for a few extra hits elsewhere often ends up costing the medal entirely.
Best Route for 100% Completion
Players aiming for complete completion should treat each campaign as a specific objective rather than attempting to unlock everything simultaneously. One run can focus entirely on discovering alternate exits, another on collecting medals, and a later playthrough can be dedicated to Expert Mode. Breaking the process into manageable goals makes the journey far more enjoyable while naturally teaching you every hidden mechanic along the way.
As you unlock additional routes, don't hesitate to revisit earlier stages. Returning with stronger game knowledge often reveals optional objectives that seemed impossible during your first attempt. Before long, you'll recognize enemy spawn locations from memory, know exactly where hidden opportunities appear, and begin planning entire runs around maximizing both score and efficiency rather than simply surviving.
Ultimately, Star Fox rewards improvement more than perfection. Every completed campaign teaches something useful for the next one, whether it's a faster route through an asteroid field, a better strategy against Star Wolf, or a more efficient way to earn the medal on a difficult stage. That's what gives the game its remarkable replay value even after dozens of hours.
Best Early-Game Priorities
If you're just starting out, resist the urge to rush toward Venom on your first try. A slower, more deliberate first run pays off far more than blitzing through on autopilot.
Set up your controls before anything else. Turn the reticle on, adjust mouse sensitivity if you're using Joy-Con gyro aiming, and decide now whether you want the classic N64 button combos or the modernized single-button versions. Fighting the controls on top of fighting enemies is a bad combination.
Play your first campaign on Easy if it's available in your build. The Arwing gets extra shielding on that difficulty specifically so you can learn enemy patterns and stage layouts without every mistake ending in a death. You still unlock Expert mode later by clearing Normal with medals, so nothing about starting on Easy locks you out of the harder content down the line.
Grab every ring you see, full stop. Gold rings climb your laser upgrade path, and reaching Hyper lasers before you hit the tougher Star Wolf fights and Venom's defenses makes an enormous difference in how fast those encounters go. Silver rings add bombs, which you'll want banked for crowded formations and boss weak points rather than burned early out of habit.
Route Planning and Alternate Paths
Once you've got a feel for the basics, route planning becomes the most interesting layer of the whole campaign. The branching structure means no two players necessarily see the same seven or eight stages on a given run, and figuring out which objectives unlock which exits is genuinely satisfying to piece together on your own.
A rough rule of thumb: routes that require you to clear an optional objective under time pressure or without losing a wingman tend to lead to the more interesting, less commonly seen stages. Fichina's Star Wolf timer gating Solar is the clearest example. If you're replaying to mop up medals anyway, treat those timed objectives as your priority target, since they're doing double duty by both opening new content and testing the exact skills the medal system wants from you.
It's also worth accepting that you probably won't see every branch in one sitting. The map is built for replays, not a single perfect run, and chasing every alternate exit on your first playthrough tends to slow the pacing down more than it adds value. Save the completionist pass for after you've beaten the campaign once and know the stages well enough to hit objectives without fumbling them.
Pre-Flight Checklist Before Every Campaign Run
Whether you're starting your very first campaign or attempting another Expert Mode clear, spending a minute preparing before launch can save a surprising amount of frustration later. Star Fox rewards consistency more than improvisation, and developing a simple pre-flight routine helps eliminate many of the mistakes that end promising runs.
| Checklist | Why It Matters |
|---|---|
| Choose your preferred control scheme. | Changing controls mid-campaign makes muscle memory harder to build. |
| Adjust aiming sensitivity if using motion controls. | Comfortable aiming improves both accuracy and reaction time. |
| Enable the aiming reticle. | Makes charged shots and precision targeting much easier. |
| Decide which campaign route you're attempting. | Different routes require different hidden objectives. |
| Know the medal requirement for your next stage. | Prevents accidentally missing score opportunities. |
| Watch your wingmen throughout the mission. | Keeping them alive is just as important as earning enough hits. |
| Save smart bombs for difficult encounters. | Bosses and large formations provide much greater value than regular enemies. |
Many unsuccessful runs don't end because players lack the skill to complete a mission. They end because small mistakes begin stacking together. Missing a wingman's distress call leads to losing a medal. Wasting a smart bomb early leaves you short during a difficult boss fight. Ignoring enemy formations means falling just below the required hit count. None of those mistakes are individually catastrophic, but together they can turn an excellent run into a disappointing one.
Building a consistent routine before each campaign helps eliminate those small errors. Once your controls feel comfortable, your route is planned, and your objectives are clear, you're free to focus entirely on flying instead of making decisions in the middle of combat. That's often the difference between simply finishing a campaign and completing one you're genuinely proud of.
Mission Strategies for Every Major Stage
A few stages deserve specific callouts, either because their bosses catch people off guard or because their optional objectives are easy to miss entirely.
Corneria opens the game gently, but don't get lazy with Granga, the boss at the end. Go for its legs first with homing missiles or a charged shot before turning your attention to the head, which is the actual weak point. Remember the arches if you want Falco's route to Sector Y.
Meteo has no boss, just a slow crawl through an asteroid field. The Flip Bots here only take damage when their backs are exposed, so lock on and wait for the opening rather than wasting shots on their armored front.
Fortuna throws a full Star Wolf squad at you. Target Wolf first since he's the one actively chasing you down, then work through Pigma, Andrew, and Leon in whatever order presents the cleanest shot. Having your lasers upgraded before this fight makes a real difference.
Fichina repeats the Star Wolf gauntlet with different members and a hard timer attached. Beat the clock and Solar opens up. The stage's actual boss, Venus paired with Gyrowing drones, wants you to clear the drones first with bombs while circling their formation before turning full attention to Venus itself.
Sector Y is where the hit-count objective lives that unlocks Aquas. Don't be precious about what you shoot here. Minor drones and destructible scenery all count toward the hundred-hit target.
Macbeth puts you in the Landmaster chasing a train. Focus your fire on rail switches and track-side explosives as you go, and save your heaviest shots for the final armored car, aiming up into its sides once you catch it.
Aquas is Blue-Marine territory. Spam torpedoes freely since they're unlimited, and barrel roll through incoming shots to trigger the EM shield rather than trying to outmaneuver everything.
Solar has no boss but plenty of lava and beam hazards raining down from above in waves. Charged shots on the enemy pods as they spawn keep the pressure off you before the hazards stack up.
Titania hides three Shock Switches inside enemy pods around the map. Find all three before the final boss fight and you go in with extra armor, which is worth the detour even if it slows your run.
Bolse is a straight dogfight in front of Venom's fleet. Keep an eye out for a hidden Silver Ring behind a waterfall, dropped after taking down one of the Star Wolf team stationed there.
Venom closes things out with the fake Andross fight, whose real weak point is the exposed brain on the back and underside of its head once you've stripped the skull away. Save your smart bombs for this phase specifically, since the brain moves around the arena and a well-placed bomb does more work than sustained laser fire ever will.
Weapon Upgrades and Resource Management
Rings are the closest thing Star Fox has to a currency system, and how you manage them shapes how every late-game fight actually plays out. Gold rings step your Arwing's laser through green, blue, twin, and finally hyper, with each tier hitting noticeably harder than the last. Getting to Hyper before Fortuna or Fichina, where you're facing down the full Star Wolf squad, turns those fights from tense to manageable.
Silver rings work differently, adding to your smart bomb count rather than upgrading a weapon directly. It's tempting to burn bombs the moment you pick one up, but they're far more valuable saved for genuinely dangerous moments, boss weak-point phases especially, than spent clearing a wave you could've handled with lasers anyway. If you're ever unsure whether to burn a bomb, ask whether regular fire would've solved the problem just as fast. If yes, save it.
One detail a lot of players miss entirely: shooting down enemy projectiles mid-air can drop extra rings. If you're running low on bombs heading into a rough stretch, it's sometimes worth the extra half-second to pop an incoming shot rather than just barrel rolling past it.
Advanced Techniques Experienced Players Should Master
Once the basics feel automatic, a few habits separate a clean Expert-mode run from a rough one. Boosting through simple, enemy-light stretches of a level saves time and lets you arrive at the next real encounter with your reflexes fresh instead of worn down from unnecessary dodging. Chaining the somersault into a charged shot right as you come out of the spin is a strong combo during dense boss phases, since it covers your recovery frame with damage instead of leaving you exposed. And if you've got a second player available, splitting pilot and gunner duties in local co-op is legitimately one of the best ways to hit tough medal thresholds, since one player can focus entirely on flying the optimal line while the other handles targeting.
Expert mode specifically punishes players who treat it like Normal with a damage multiplier. Enemy placement actually shifts, there are no continues, and new threats show up in spots you'd cleared without thinking on lower difficulties. Go in expecting to relearn stages you thought you'd mastered.
How to Improve Faster and Play Like a Veteran
One of the reasons Star Fox has remained popular for decades is that improvement feels tangible. Every completed run teaches something useful, whether it's discovering a better angle through an asteroid field, learning exactly when a boss becomes vulnerable, or realizing that an enemy formation can be destroyed with a single charged shot instead of half a dozen standard lasers. Unlike many modern action games that rely on character progression, Star Fox rewards player progression. Your ship doesn't permanently become stronger. You simply become a better pilot.
New players often assume surviving is the primary objective, but experienced pilots approach every mission differently. They aren't thinking about reaching the goal as quickly as possible. Instead, they're constantly scanning the environment for additional targets, planning their next charged shot, protecting their wingmen, and positioning themselves to maintain a high hit count throughout the stage. Once you begin playing with that mindset, your scores naturally improve without needing to consciously chase them.
Learn Enemy Patterns Instead of Reacting
Every stage in Star Fox is carefully scripted. Enemy formations appear in the same locations, bosses follow predictable attack patterns, and hidden objectives always trigger under the same conditions. While that might sound repetitive on paper, it actually becomes one of the game's greatest strengths because every replay allows you to prepare instead of simply reacting.
Rather than asking yourself how to survive an encounter, start asking where enemies will appear next. Once you know their spawn locations, you can begin charging shots before they even enter the screen, allowing you to destroy entire formations almost immediately. The same applies to bosses. Most major encounters feel difficult only until you recognize their attack cycle. After that, they become exercises in timing rather than raw reflexes.
Positioning Is More Important Than Constant Movement
Many players instinctively dodge across the entire screen whenever enemy fire appears. While movement is important, unnecessary movement often causes more problems than it solves. Drifting too far toward the edge of the screen can make incoming enemies harder to track, reduce your ability to line up charged shots, and even cause you to miss destructible scenery that contributes toward your medal count.
Experienced players tend to make smaller, deliberate adjustments instead. They remain close to the center whenever possible, moving only as much as necessary to avoid incoming fire while keeping their crosshair positioned where the next wave is expected to appear. This approach not only improves accuracy but also makes the battlefield feel much less chaotic.
Think of Bombs and Shields as Emergency Resources
One of the easiest habits to develop is using smart bombs the moment a large group of enemies appears. While satisfying, it's rarely the most efficient option. Most formations can be cleared with a charged shot or careful positioning, allowing you to save bombs for encounters that genuinely benefit from their massive damage output.
The same philosophy applies to your shields. Taking occasional damage isn't a failure if it allows you to preserve a stronger position or maintain your laser upgrades. Experienced players understand that avoiding every single hit often forces them into worse situations later in the stage. Instead, they focus on minimizing unnecessary damage while collecting rings whenever the opportunity presents itself.
Replay Stages with a Specific Goal
If you're struggling with a particular mission, avoid repeatedly attempting the exact same strategy and hoping for a different outcome. Each replay should have a clearly defined objective. One run might focus entirely on keeping every wingman alive. Another might prioritize learning enemy spawn locations. A third could concentrate solely on reaching the medal requirement without worrying about alternate routes.
Breaking your practice into smaller objectives makes improvement feel much more manageable and prevents frustration from building after repeated failures. Before long, you'll notice that skills developed on one stage naturally transfer to every other mission in the campaign.
Pay Attention to Your Team
Falco, Peppy, and Slippy aren't simply background characters filling the radio chatter. Their survival directly affects medal opportunities, and they frequently warn you about incoming threats, boss mechanics, and hidden opportunities throughout the campaign. Ignoring their calls for help often creates unnecessary pressure later in a mission, while responding quickly usually rewards you with additional support and a smoother path toward earning a medal.
As your experience grows, you'll eventually start predicting when each wingman is likely to need assistance. Helping them becomes second nature, allowing you to maintain momentum without sacrificing your own positioning or score.
Ultimately, the best Star Fox players aren't necessarily those with the fastest reactions. They're the ones who understand each stage well enough that very little catches them by surprise. Once enemy patterns become familiar and every mission starts feeling predictable, you'll discover that higher scores, cleaner runs, and more medals begin arriving almost automatically.
Common Mistakes Almost Every New Player Makes
The single biggest one is treating barrel roll as a universal panic button. It only stops projectiles. Rolling into a wall, a ship's hull, or a piece of terrain does nothing but waste the input while you take full damage anyway.
Ignoring R.O.B. 64's supply prompts is another one that costs people more than they realize. Those windows are brief, and missing the prompt means forfeiting whatever aid was on offer for that run, whether that's ammo, shields, or backup fire.
Plenty of players also skip minor targets and destructible scenery because they're not actively shooting back, not realizing every one of those counts toward the medal hit quota. If it can be destroyed and you've got a spare shot, take it.
And don't underestimate how much a wingman death costs you. Medals require keeping your allies alive alongside hitting the quota, so a Falco or Peppy loss late in a stage can undo an otherwise strong run even if your hit count was fine.
Best Settings and Accessibility Options
The remake gives you a genuinely solid amount of control over how the game feels in your hands, and a few tweaks are worth making immediately rather than after you've already fought through a stage the hard way. Turning the reticle on helps with both charged shots and cockpit-view precision. If you're using Joy-Con mouse mode, spend two minutes in the sensitivity settings before your first real mission rather than mid-fight, since the default can feel too twitchy for fine aiming. Players who grew up on the N64 original will likely want the classic button-combo scheme for somersault and U-turn active from the start, while newcomers are probably better off with the simplified single-button modern layout. None of these choices are locked in permanently, so don't be afraid to switch back and forth while you figure out what actually feels right for your hands.
Multiplayer Tips
The post-launch Battle Mode update turned Star Fox into a genuine 4v4 objective shooter on top of its campaign, and it plays nothing like a straightforward deathmatch. Zone control on Corneria, item collection on Fichina, and a capture-the-flag-style cargo mode on Sector Y all reward teams that stick to the objective over players hunting kills. New players consistently make the mistake of chasing eliminations instead of holding position, and it costs matches more often than it wins them.
Star Fox's Arwings run stronger shields and quicker target lock, which makes them better suited to holding an objective under pressure, while Star Wolf's Wolfens turn tighter and boost harder, which favors chasing down a fleeing target. A team that mixes both rather than stacking one ship type tends to cover more situations. Keep radar up to track cargo and power-up spawns, and if situational awareness is an issue, dropping motion blur and camera shake in the video settings genuinely helps in the middle of a chaotic team fight.
Week One Discoveries and Early Community Strategies
Since launch, the day-one 1.1.0 patch has already reshaped a few things worth knowing about if you're coming in now rather than at release. Battle Mode itself was part of that update rather than shipping day one, along with the new Easy campaign difficulty and a handful of fixes to mission-breaking glitches, including a boost exploit on Meteo and a tank shell bug on Aquas. If you're reading older impressions from launch week that mention either of those, know that they've been patched since. As of writing, no major game-breaking bugs remain widely reported, though the usual online lag during Battle Mode matchmaking still shows up depending on your region.
Frequently Asked Questions
What platforms is Star Fox available on?
Star Fox (2026) is a Nintendo Switch 2 exclusive. There's no version planned or available for the original Switch or any other console.
Does the story differ from the original Star Fox 64?
No. The remake follows the same story and stage layout as the 1997 original, with new cutscenes and dialogue added to flesh things out, but no new planets or missions.
Is Star Fox single-player or multiplayer?
Both. The campaign is single-player with an optional local two-player co-op mode, and the 1.1.0 patch added a separate four-player online Battle Mode on top of that.
How long is a single campaign run?
Expect roughly 15 to 20 minutes per playthrough across seven stages, though the branching routes mean there are 25 possible paths through the game, and medals plus Challenge Mode and Expert difficulty add plenty of reason to go back.
How do I unlock Expert mode?
Earn at least one medal on every stage during a campaign run at any difficulty. That unlocks both Challenge Mode and the Expert campaign.
Can I remap the controls?
You can't fully remap every input, but you can toggle the classic N64 combo controls on or off, which changes how moves like the somersault and U-turn are performed. Swapping Joy-Con stick assignments is also possible through the Switch system settings.
Are there any known bugs left after the day-one patch?
Most early issues, including a boost glitch on Meteo and a shell bug on Aquas, were fixed in the 1.1.0 update. No major game-breaking bugs are currently being widely reported.
Star Fox rewards the kind of player who treats every stage as something to be cleared thoroughly rather than survived quickly. Shoot the scenery, save Falco when you can, keep an eye on the world map after every mission, and don't burn your bombs on fights lasers could've handled just fine. Get those habits down in your first few hours and the harder routes, the medal grinding, and eventually Expert mode stop feeling like obstacles and start feeling like exactly the kind of challenge this remake was built to offer.
This guide has been researched using official Nintendo resources, developer updates, patch notes, and reputable gaming publications, with community-tested strategies included where they have been consistently verified. The article will be updated as the game evolves and new discoveries emerge.