

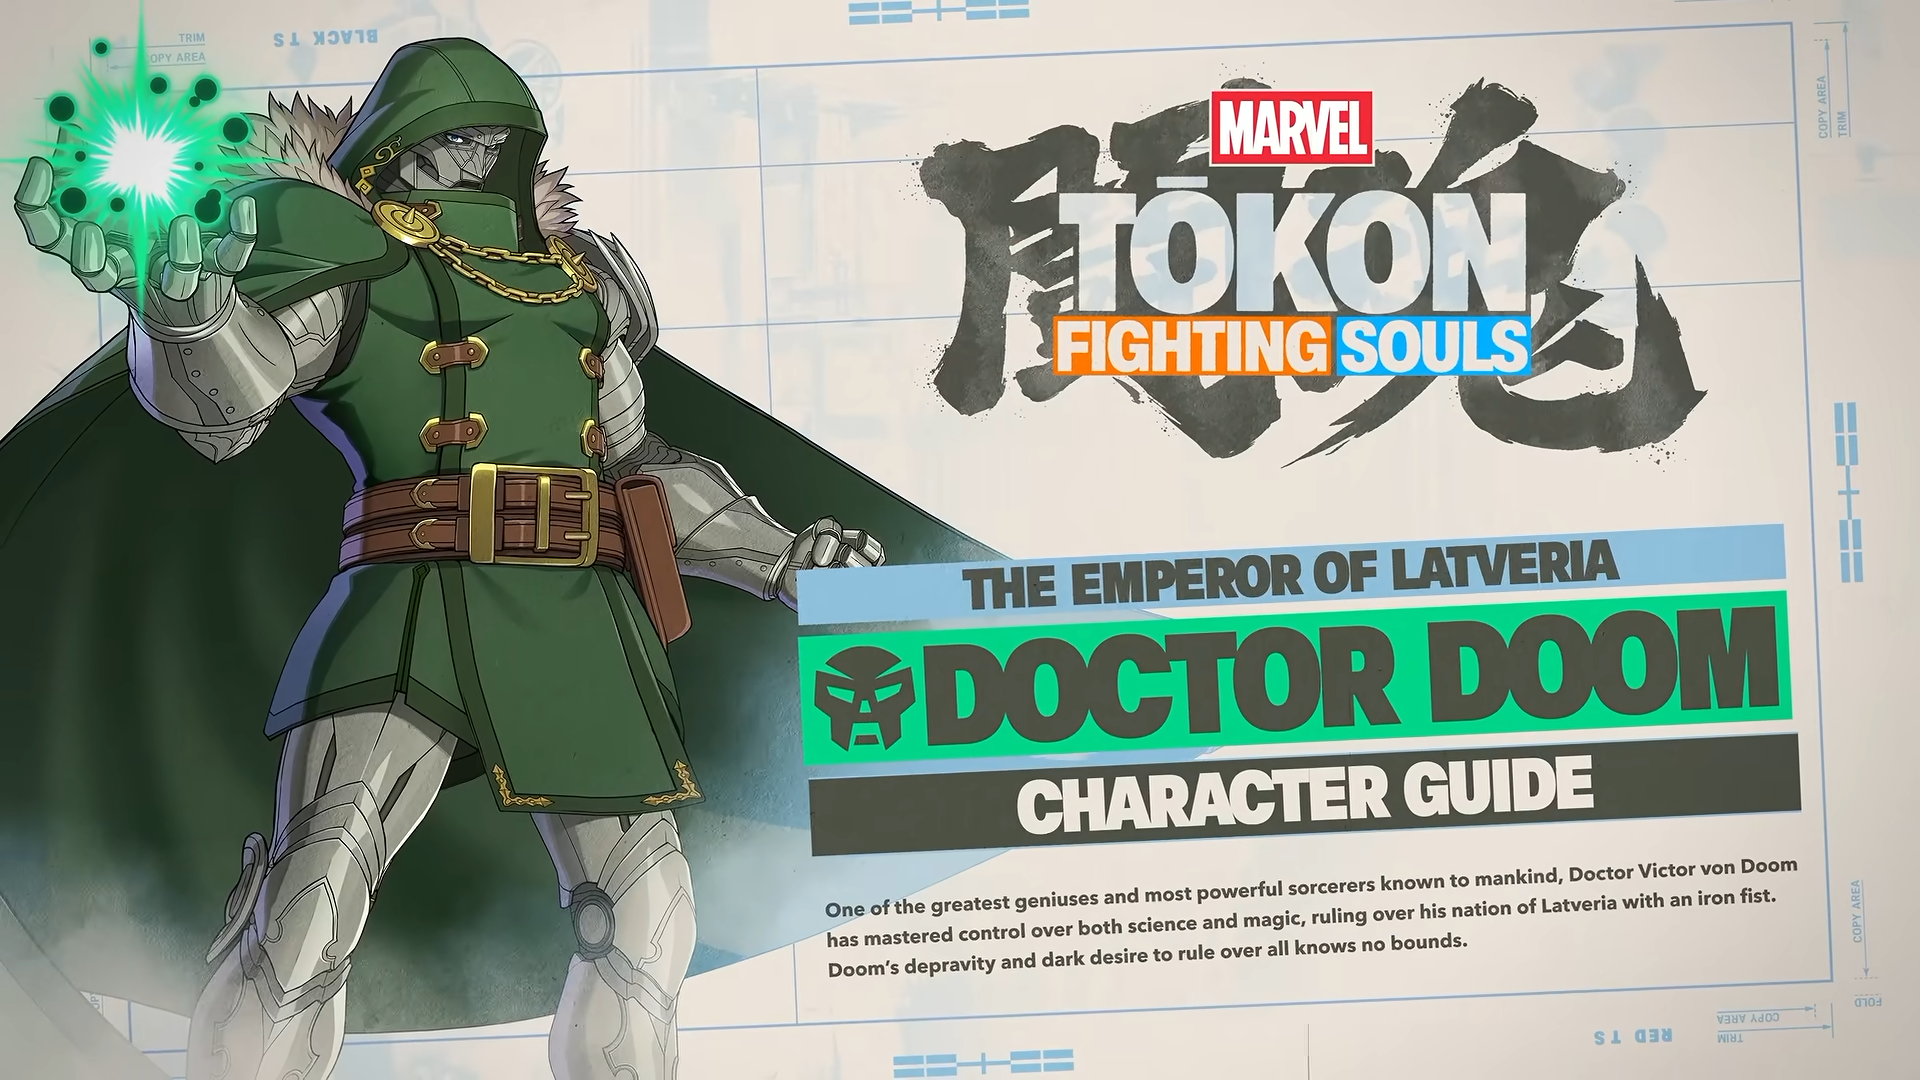
Doctor Doom is not a character you rush in with. He is a character you make the other player come to.
Arc System Works built him as one of the six original playable fighters in Marvel Tōkon: Fighting Souls, and everything about his kit points in the same direction: keep your distance, fill the screen, and let the opponent walk into something. Between two beam angles, a shocking projectile, a delayed satellite laser, and a shield that eats incoming attacks, Doom rarely has to guess what to throw out next. He usually just has to pick which one fits the range.
The official character guide Arc System Works released on July 6 rated his ease of use at four out of five stars, which lines up with what most players noticed during the alpha and beta tests. He is not the hardest character to pick up, but getting real value out of him means understanding spacing, not just mashing buttons at a safe distance and hoping it works out.
This guide breaks down his normals, every Skill, his Unique Abilities, his Super and Ultimate Skills, his assists, and how to actually think about spending meter with him. Marvel Tōkon: Fighting Souls launches on PS5 and PC on August 6, 2026, with an open beta running July 24 through 26, so if you are planning to main Doom at launch, this is a good time to start building the habits that make him work.
Doctor Doom Overview
Doom is a zoning character in a game that otherwise leans fairly aggressive. Instead of rushing opponents down, he wants to sit at a range where his projectiles land clean and his Nullify Shield can shut down whatever the opponent tries to answer with.
His toolkit lets him:
- Control neutral through multiple projectile angles
- Wall out enemy zoning with a dedicated defensive Unique Ability
- Teleport past opponents to punish mistakes or reset position
- Fly to create attack angles a grounded character cannot
- Force opponents to approach on his terms instead of the other way around
Ease of Use: ★★★★☆ (4 out of 5, per Arc System Works' official character guide)
Doctor Doom Playstyle
Doom is built around screen control, full stop. Where a rushdown character wants to close distance and stay in your face, Doom wants the opposite. He forces you into uncomfortable positions with beams, electricity, and a delayed satellite laser, then punishes whatever you do to try to get out of them.
| Strengths | Weaknesses |
|---|---|
| Excellent zoning across multiple ranges | Needs consistent spacing to function |
| Strong anti-projectile tools via Nullify Shield | Loses a lot of value if opponents stay in his face |
| Great mobility through Free Flight and teleport dashes | Meter management gets tricky with so many Heavy versions to spend on |
| Teleports create real mixup potential | Punishable if his projectiles get read and jumped |
Once you understand this trade-off, Doom starts to make a lot more sense. He is not trying to win a footsies exchange up close. He is trying to make sure that exchange never happens in the first place.
Normal Attacks and Link Attacks
Doom's normals follow the standard structure you will find across the Marvel Tōkon roster: Standing Light, Crouching Light, and Air Light, each with Medium and Heavy versions layered on top. Heavy attacks also carry directional aerial variations, giving him a bit more range in the air than his grounded normals suggest at a glance.
These normals feed directly into his Link Attacks. Stringing together Light, Medium, or Heavy attacks in sequence, or mixing standing and crouching versions, builds combos that eventually route into his specials. Nothing here is unique to Doom specifically, but it is worth drilling early, since almost every combo in this guide assumes you can already chain a basic Link Attack without thinking about it.
Doctor Doom Skills
Diplomacy
Doom lunges at the opponent, grabs them, and slashes. It is a command grab, which is new territory for him compared to his older Marvel vs. Capcom appearances, and it gives him an answer against players who try to sit and block through his zoning.
The Light version activates Break. The same Break effect can also be triggered by pressing Light one more time after a Link Attack, which makes Diplomacy just as useful as a combo ender as it is an opening tool. The Heavy version raises the stakes further, since it can cause a stage break or teleport Doom directly to the opponent, closing distance instantly against players who try to keep their guard up and wait him out.
Best used for: command grabs, combo enders, Break setups, and punishing defensive opponents who refuse to engage.
Mystic Cage
Doom releases an electric shock directly in front of him. The Medium and Heavy versions hit multiple times, and the Heavy version lets Doom move forward even while the opponent is still blocking, leaving him plus on block and in a strong position to keep pressing. That Heavy version costs 25 Skill Gauge.
Best used for: pressure after blocked strings, frame advantage, locking opponents in place, and extending combos.
Auric Ray
Doom fires a high-speed energy beam that can cover most of the screen. The Medium version angles upward, giving it some use as an anti-air, while the Heavy version widens the beam to cover more space at once. Like the Heavy Mystic Cage, this version costs 25 Skill Gauge.
Best used for: long-range zoning, anti-air coverage, general screen control, and closing out combos.
Merciful Smite
This is probably Doom's most interesting Skill, and one of the better examples of how deliberately Arc System Works built his kit around layered pressure rather than single big hits.
The Light version summons a satellite laser from above. It slowly drifts toward Doom, stops once it hits a certain distance or contacts the opponent, then fires after a short delay. The Medium version appears in front of Doom and travels away from him instead, with a longer delay before it fires. The Heavy version tracks the opponent's position directly and, crucially, can be combined with Doom's own offense while the satellite charges. It costs 25 Skill Gauge.
That last detail is what makes Merciful Smite so strong. The delayed beam forces the opponent to respect an attack that has not landed yet, while Doom stays completely free to keep moving, zoning, or setting up his next attack. It is the closest thing Doom has to a genuine unblockable mixup, since the opponent has to split their attention between the satellite overhead and whatever Doom is doing on the ground.
Best used for: layered offense, forcing opponents to respect multiple threats at once, and covering Doom while he repositions.
Unique Abilities
Free Flight
Holding Up activates flight. While airborne, Doom gets a limited window of unrestricted aerial movement, which opens up a handful of things a grounded zoner normally cannot do: repositioning mid-air, better beam angles for Auric Ray, cross-up pressure, and a genuine escape option when he gets cornered.
Flight is strong, but predictable flight paths get punished hard. Treat it as a tool for specific situations, not a default movement option.
Dash (Phase Teleport)
Rather than a traditional ground dash, Doom teleports. He can teleport forward, teleport backward, and pass straight through the opponent at the right distance, which makes this one of his more versatile movement tools once you get comfortable with the spacing.
It is particularly good for escaping pressure, switching sides, creating mixups off a read, and punishing opponents who throw out projectiles from a distance they think is safe.
Nullify Shield
This is Doom's signature mechanic, and arguably the single most important tool in his kit.
The basic version creates a barrier that blocks incoming projectiles. A directional input places it farther away from Doom, which matters against zoning characters who like to fight from max range, since it lets him contest that space without stepping into it himself.
Holding the Unique button charges the shield further, strengthening the barrier so it can also function as a projectile of its own. It disappears if it is hit by a non-projectile attack, and holding the input longer grants it an additional hit before it breaks. It can also be placed behind the opponent, where it can hit them and pull them toward Doom, turning a purely defensive tool into something that sets up his offense too.
Best used for: counter-zoning, creating safe approaches, controlling neutral, and protecting assists as they come in.
Skill Gauge Costs
Several of Doom's Heavy versions consume Skill Gauge, and it adds up fast if you are not paying attention.
| Skill | Cost |
|---|---|
| Auric Ray (Heavy) | 25 |
| Mystic Cage (Heavy) | 25 |
| Diplomacy (Heavy) | 25 |
| Merciful Smite (Heavy) | 25 |
Super Skill: Antimatter Extrapolator
Skill Gauge Cost: 50
The ground version fires a powerful energy blast from Doom's pistol that ends in an explosion, working well as both a combo finisher and a hard-hitting punish. The air version fires downward at an angle instead, giving Doom a way to close out aerial combos or control space directly beneath him.
Ultimate Skill: Latverian Legion
Skill Gauge Cost: 100
Doom summons magic circles to restrain the opponent before finishing them off with a squad of Doombots. Range changes how it behaves: up close it deals more damage, while at long range it tracks the opponent's position after a brief delay.
The part that actually changes how you should think about spending meter is the passive effect. After Latverian Legion is used, Nullify Shield receives a power-up for the rest of the round. That is a real, lasting reward on top of the damage from the Ultimate itself, and it is a big part of why saving meter for this instead of burning it all on Heavy versions can be the better long-term play in a close match.
Tokon Assemble
Skill Gauge Cost: 150
Tokon Assemble is only available once losing the current round would end the match. It grants invincible startup, brings the entire team in together, and can be activated from neutral or off the end of a Link Attack. It is a desperation tool by design, but a genuinely dangerous one if the opponent is not expecting it.
Assist Types
Doom's assists carry his zoning identity even when he is not the character on screen, which makes him a solid pick for the anchor or point position depending on how your team wants to use him.
| Assist | Effect |
|---|---|
| Assemble Rush | Shockwave attack, good for combo extension. Costs 1 Assemble Gauge after attacks connect. |
| Assemble Assist Assault | Summons a delayed satellite laser from above, keeping Doom's zoning relevant even off-screen. |
| Assemble Assist Shooter | A straight beam that works as an excellent poke assist, probably the better pick for aggressive point characters. |
Doctor Doom's Best Tools By Category
| Category | Best Option |
|---|---|
| Neutral Tools | Auric Ray, Nullify Shield, Merciful Smite |
| Combo Starter | Diplomacy |
| Pressure Tool | Merciful Smite (Heavy) |
| Anti-Zoning Tool | Nullify Shield |
| Mobility | Free Flight and teleport Dash |
Meter Priorities
Doom has a lot of places to spend 25 gauge, and it is easy to burn through meter without a real plan.
Spend 25 Gauge on Heavy Mystic Cage, Heavy Auric Ray, Heavy Diplomacy, or Heavy Merciful Smite when you need the immediate pressure or damage. All four are strong in the moment.
Save 100 Gauge for Latverian Legion if you want the permanent Nullify Shield buff for the rest of the round. In longer matches, that lasting upgrade to your best defensive tool is often worth more than another round of Heavy versions spent early.
Character Archetype
| Category | Rating |
|---|---|
| Zoning | ★★★★★ |
| Neutral Control | ★★★★★ |
| Mobility | ★★★★☆ |
| Mixups | ★★★★☆ |
| Defense | ★★★★★ |
| Beginner Friendly | ★★☆☆☆ |
| Meter Dependence | ★★★★☆ |
Beginner Tips
1. Control the screen. Do not chase opponents down. Make them come to you through Auric Ray, Mystic Cage, and Nullify Shield.
2. Use Flight sparingly. It gives Doom real mobility, but a predictable flight path is an easy punish for anyone paying attention.
3. Teleport after conditioning. Once an opponent starts respecting your projectiles and hesitates to approach, Dash becomes a much stronger option.
4. Lean on Nullify Shield against projectile-heavy teams. It is one of Doom's strongest defensive tools, and often the difference between winning and losing a zoning mirror.
5. Spend meter with a plan. Heavy versions improve pressure considerably, but burning all your Skill Gauge early can leave you without defensive options, or without Latverian Legion, later in the round.
Frequently Asked Questions
Is Doctor Doom good for beginners in Marvel Tōkon: Fighting Souls?
Arc System Works rates his ease of use at four out of five stars, so he is approachable, but he still rewards players who understand spacing and are comfortable managing Skill Gauge across several different Heavy versions.
What is Doctor Doom's best neutral tool?
Auric Ray and Nullify Shield cover most situations. Merciful Smite adds a layered threat on top of both once you get comfortable timing the delay.
Does Doctor Doom have a command grab?
Yes. Diplomacy is a command grab that also doubles as a combo ender and a Break starter, giving him an answer against opponents who try to sit and block.
What does Doctor Doom's Ultimate Skill do?
Latverian Legion restrains the opponent with magic circles before finishing with Doombots, and it permanently strengthens Nullify Shield for the rest of the round after it connects.
When does Doctor Doom launch in Marvel Tōkon: Fighting Souls?
He is part of the original six-character roster confirmed for launch, which is scheduled for August 6, 2026, on PS5 and PC, with an open beta running July 24 through 26.
Continue Reading Our Marvel Tōkon Coverage
Explore more Marvel Tōkon: Fighting Souls character guides in our Marvel Tōkon Guide Hub.
Note: This guide is based on Arc System Works' official Storm character guide and currently available gameplay footage. We'll continue updating it as Marvel Tōkon: Fighting Souls receives balance changes, new discoveries, and additional competitive strategies after launch.