
Overview
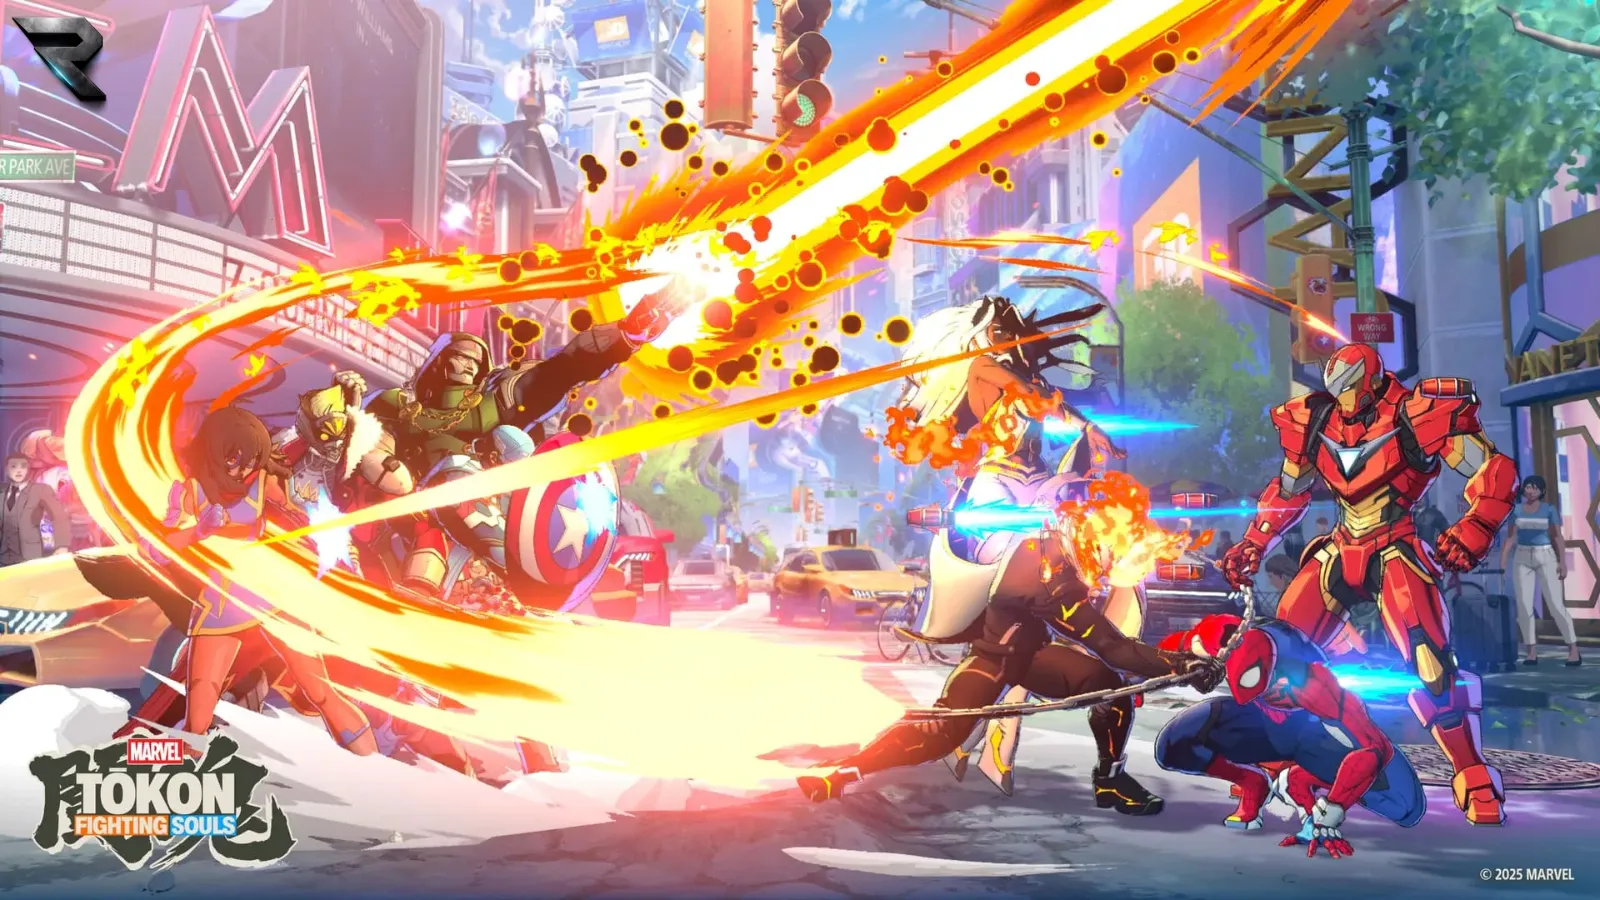
Marvel Tōkon: Fighting Souls can look deceptively simple when you first pick it up. The basic controls are approachable, the characters are instantly recognizable, and the game gets you into a fight without demanding hours of prior fighting game knowledge.
But once the punches start flying, there is a lot more happening underneath the surface. Four characters on a team, multiple assist types, tagging, the Assemble system, two separate resource gauges, wall interactions, unique character mechanics, and a combo system with rules that are easy to miss.
The good news is that you do not need to master all of it at once. This beginner's guide focuses on the universal mechanics and practical tips that matter most once you have finished the game's introductory lessons. For character-specific moves, combos, and playstyles, check the individual character guides in the Marvel Tōkon: Fighting Souls Guide Hub.
In This Guide
- Basic Attack Buttons
- Start With the Basics, Not the Flashy Combos
- Quick Skills Are Fine, Even If You Know Fighting Game Inputs
- Understand Your Two Main Resources
- Your Entire Team Is Not Available at the Start of a Round
- Learn What Your Assist Slots Actually Do
- Your Assist Is a Resource, Not a Free Button
- Tagging Is More Than Swapping Characters
- Throw More Than You Think You Need To
- Learn the Basic Mix-Up: Low, Overhead, Throw, Cross-Up
- Down Heavy Is Your Universal Anti-Air
- Assemble Attacks Are More Than Combo Tools
- Your Defensive Assemble Options Matter Too
- Learn How to Recover After Getting Launched
- Understand Tōkon's Combo Rules Before You Chase Big Damage
- Auto Combos Are Fine When You Are Learning
- Start With a Simple Combo Before Chasing Optimization
- Do Not Assume an Assist Means You Are Still Safe
- Use Training Mode for More Than Practicing Combos
- Replay Takeover Can Turn Your Losses Into Practice
- Character Lessons Are Worth Completing
- Do Not Ignore the Single-Player Content
- Check the Quick Menu
- The Best Way to Learn Marvel Tōkon
- Beginner Guide FAQ
- Final Thoughts
Beginner Guide at a Glance
- Team Size: 4 characters, only 2 available at the start of a round
- Core Resources: Super Meter and Assemble Gauge
- Universal Anti-Air: Down Heavy
- Universal Mix-Up: Low, Overhead, Throw, Cross-Up
- Best Habit to Build Early: Testing assist follow-ups and punishes in Training Mode instead of guessing online
Basic Attack Buttons
Before anything else, it helps to know what your buttons actually do.
| Button | Function |
|---|---|
| Light | Fast, lower damage, chains into itself and Medium |
| Medium | Mid-speed, chains into itself and Heavy |
| Heavy | Slower, higher damage |
| Down Heavy | Launcher for aerial combos, also the universal anti-air |
| Unique | Changes function depending on the character |
Start With the Basics, Not the Flashy Combos
If Marvel Tōkon is your first fighting game, or even your first team-based fighter, resist the temptation to immediately memorize complicated combo videos. Start by understanding what your buttons actually do.
You can learn the universal rules of Tōkon, but every character has their own quirks layered on top, so your chosen character's command list is worth checking even after you understand the basic controls.
If you have not chosen a main yet, the Respawnerz Marvel Tōkon Guide Hub already has guides covering all 20 launch characters, including their unique mechanics, assists, combos, and beginner tips.
Quick Skills Are Fine, Even If You Know Fighting Game Inputs
Marvel Tōkon gives you two ways to perform many special moves. You can use traditional fighting game inputs, such as quarter-circle motions, or you can use Quick Skills to perform the move directly with a button.
Quick Skills make the game much more accessible if you are unfamiliar with traditional inputs or struggle to execute them consistently. The tradeoff is that shortcut versions deal slightly less damage than their full-input equivalents.
That does not mean you should avoid them. If a traditional input causes you to drop a combo, miss a reversal, or hesitate when you need a move immediately, the slightly lower damage is often a worthwhile trade. Think of Quick Skills as an option rather than training wheels, and experiment with traditional inputs once you are comfortable to see whether the extra damage is worth the added execution.
Understand Your Two Main Resources
One of the first things you should learn is the difference between your Super Meter and your Assemble Gauge.
Your Super Meter powers your more damaging attacks, including enhanced moves and your 50-meter and 100-meter supers. The devastating Tōkon Assemble attack uses the full meter and has additional conditions attached to it.
Your Assemble Gauge is different. It powers assists and a variety of universal offensive and defensive mechanics, which makes it one of the most important resources to track during a match.
This distinction changes how you approach the game. You are not simply saving meter for a flashy super, you are constantly deciding how much Assemble resource to spend on assists, pressure, defensive escapes, or other mechanics. Having meter is useful, but knowing when to spend it is what actually matters.
Your Entire Team Is Not Available at the Start of a Round
This is one of the most important things for a new player to understand. Marvel Tōkon's four-character team system does not give you unrestricted access to all four characters and their assists the moment a round begins.
You start with your first two characters available, while additional teammates unlock during the fight. The primary way to unlock them is through wall interactions: throwing an opponent into a wall, knocking them into one with another move, or sending them through a stage transition. Losing a round can also unlock a character as a comeback mechanic, but actively creating wall interactions is the more proactive route.
There is a bigger reason to care about this beyond simply gaining another fighter. Unlocking teammates also increases your maximum Super Meter and Assemble Gauge, so your full team is considerably more powerful than the partially unlocked version you begin the round with. Your devastating Tōkon Assemble attack only becomes available once your full team has been unlocked, and it can only be used under the appropriate late-round conditions.
So during your first few matches, do not treat wall interactions as something that only happens at the end of a combo. Unlocking your team is part of the fight.
Learn What Your Assist Slots Actually Do
Assists are one of the biggest reasons Marvel Tōkon feels different from a traditional one-on-one fighter. Your teammates are not simply waiting on the sidelines, they can attack, extend combos, create pressure, control space, and help you approach the opponent.
The directional Assemble inputs determine which teammate and assist type you call. The names describe their general purpose, but do not assume every character performs the same kind of attack in each slot; the actual move depends on the character occupying that position.
| Direction | Assist Type |
|---|---|
| Forward | Shooter assist |
| Down | Vertical assist |
| Back | Character-specific assist |
A Shooter assist does not necessarily have to be a projectile, and a Vertical assist does not necessarily have to look like a traditional uppercut. That is why team building matters. If you like a particular character's assist, that character can be valuable to your team even if you do not want to play them as your active fighter.
Your Assist Is a Resource, Not a Free Button
One of the easiest mistakes for beginners is seeing that their assist has regenerated and immediately calling it whenever possible. Marvel Tōkon gives you a lot of freedom with assists, including situations where multiple can appear on screen at once, but when you use them during combos or extended pressure, your Assemble Gauge becomes a real limitation.
This matters especially during block strings. You cannot keep calling assists forever while continuously attacking a blocking opponent, since the Assemble Gauge limits how long you can maintain that kind of pressure.
The practical lesson is simple: do not spend your entire Assemble Gauge just because you can. Sometimes the better play is saving a bar for a defensive option or a more important combo extension. As you improve, you will start recognizing which assists are worth spending resources on and which situations are better handled without them.
Tagging Is More Than Swapping Characters
Marvel Tōkon's tagging system can initially seem straightforward: press the tag button and another character takes over. But because the game uses a shared health bar, tagging does not restore a damaged character. Your incoming fighter is still carrying the team's existing damage.
That makes tagging more about positioning, pressure, timing, and team synergy than simply saving a nearly defeated character.
There is also a more advanced technique called Raw Tag. It lets you switch characters without calling an assist, and there is a small delay between initiating the tag and actually taking control of the incoming character. That delay can be exploited so the outgoing character keeps performing an action while the incoming character takes over. You do not need to master Raw Tag on day one, but once you understand basic tagging, it is one of the first advanced mechanics worth experimenting with.
Throw More Than You Think You Need To
Throws are a basic fighting game mechanic, but they carry extra importance in Tōkon. A normal throw can be performed with Medium and Heavy together, and if you are not already right next to the opponent, your character can run toward them as part of the attempt. That makes throws particularly useful against opponents who are constantly blocking.
More importantly, throws can create the wall interactions that help unlock additional members of your team. So if your opponent refuses to stop blocking, do not keep throwing the same attack into their guard. Throw them instead, it is not just a way to open their defense, it can also help unlock more of your team's resources.
Learn the Basic Mix-Up: Low, Overhead, Throw, Cross-Up
Eventually, you will run into an opponent who seems impossible to hit because they block everything. This is where mix-ups become important.
A low attack beats standing defense, overheads catch opponents who are crouch blocking, throws beat blocking entirely (though normal throws can be teched), and cross-ups attack from the opposite side and force the defender to change their blocking direction.
You do not need an elaborate mix-up strategy when you are starting out. Just understand the basic triangle: if your opponent keeps blocking low, attack high. If they stand block, attack low. If they keep blocking everything, throw them. Once you understand that, fighting defensive players becomes much less frustrating.
Down Heavy Is Your Universal Anti-Air
If there is one defensive button you should learn early, it is Down Heavy. Marvel Tōkon is an extremely mobile game, and opponents will spend a lot of time jumping, air dashing, and attacking from above.
Down Heavy provides a universal anti-air option against jumping attacks, and its early invulnerability against airborne attacks makes it one of the simplest answers to an opponent repeatedly attacking from the air. There are character-specific anti-air moves too, and your chosen fighter may have better options in particular situations, but when you are still learning, the rule of thumb is simple: someone jumps at you, Down Heavy.
Assemble Attacks Are More Than Combo Tools
The Assemble system is one of the defining mechanics in Marvel Tōkon, and it is worth learning early because it works on both offense and defense.
The universal Assemble Attack can function as an overhead, giving every character a way to force the opponent to defend high. It also has defensive properties that can help you deal with projectiles and attacks.
The catch is the resource cost. Using Assemble mechanics consumes your Assemble Gauge, which is already needed for assists and other important options, so you should not mash Assemble every time you want to get in. Think of it as a powerful tool you want to use deliberately.
Your Defensive Assemble Options Matter Too
Marvel Tōkon also gives every character universal defensive tools through the Assemble system. The Assemble back dash provides an invincible escape option, while the Crossover Reflect can be used while blocking to push an opponent away and interrupt pressure. Both consume Assemble resources.
The important word here is invincible, and armor is not the same thing as invincibility. The defensive Assemble back dash is designed to escape attacks and throws, but it can still be punished if the opponent recognizes what you are about to do and waits out the recovery. Do not turn it into a panic button, use it when you actually need it.
Learn How to Recover After Getting Launched
You are going to get hit a lot, especially while you are learning. Knowing how to recover can prevent an opponent from turning one mistake into an enormous combo.
When an air recovery is available, holding a button lets your character tech out, while holding a direction lets you influence the direction of the recovery. Holding the Unique button can instead force a ground recovery.
This is one of those small mechanics that becomes much more important once you start playing against people who know how to extend combos. Do not simply mash buttons and hope for the best, learn what your recovery options are and start paying attention to when you are actually allowed to escape.
Understand Tōkon's Combo Rules Before You Chase Big Damage
Once you are comfortable moving around the screen, you will probably want to learn combos, and this is where Marvel Tōkon's system starts getting interesting.
There is a basic progression between normal attacks: Light attacks chain into themselves and Medium attacks, while Medium attacks chain into themselves and Heavy attacks. Repeating attacks in certain ways can instead trigger the game's auto combo behavior.
You also need to pay attention to the combo gauge. The more normal attacks you add, the closer you get to the point where the opponent automatically escapes the combo, so the gauge effectively puts a ceiling on how long your combo can continue.
This is where assists and enhanced attacks matter. Enhanced moves do not raise the combo gauge the way normal attacks do, while calling assists can reduce the gauge and give you room to keep going. Good combos are not simply about pressing lots of buttons, they are about managing the resources and limitations that determine how long a combo can stay active.
Auto Combos Are Fine When You Are Learning
There is no shame in using auto combos. If you are completely new to fighting games, they let you produce useful damage while you learn movement, assists, defense, and neutral.
Repeatedly pressing Light can produce an auto combo that eventually leads into a super, and different attack buttons can influence which type of super the sequence ends with. Are auto combos optimal? No. But they can be a useful bridge between not knowing what you are doing and understanding enough to start learning proper combo routes. Once you are comfortable, move beyond them.
Start With a Simple Combo Before Chasing Optimization
There is a near-universal combo route designed to give players a practical starting point without requiring hours of character-specific route building. The exact sequence does not work for every character, but it demonstrates the general structure of launchers, air attacks, assists, and special-move enders.
Do not treat a general combo as the "best combo" for your character. Use it as a learning exercise for the following structure:
- Confirm into a launcher
- Follow the opponent into the air
- Add an assist
- Continue the sequence
- End with a special move
- Spend Super Meter when appropriate
Once you understand that structure, move over to your character's dedicated guide and learn routes built specifically around their mechanics.
Do Not Assume an Assist Means You Are Still Safe
This is one of the most useful lessons for players moving beyond the beginner stage. You might assume that calling an assist after your attack automatically means you get to keep attacking, but that is not necessarily true.
The universal dashing assist, for example, can leave you with only a small advantage, or even slightly negative frame advantage, against a blocking opponent. If you blindly dash forward and press Light afterward, the opponent may be able to interrupt you.
The important takeaway is not to memorize one character's frame data, it is to stop assuming it is automatically your turn. Test your assist sequences in Training Mode, see which attacks are safe afterward, and learn which follow-ups create real pressure versus which ones simply give the opponent a chance to hit you. That small habit will save you a lot of losses online.
Use Training Mode for More Than Practicing Combos
Training Mode is where you should go when you cannot figure out why something keeps happening. The default training menu does not expose every available setting, but changing the menu type reveals additional parameters, including more detailed dummy, battle-state, and display options, which makes it much more useful than standing in front of a stationary dummy and practicing a combo.
Use it to answer real questions: Can I punish this move? Can I anti-air this approach? Can my assist actually keep pressure going? What happens if I block this sequence? Can I escape this combo?
Replay Takeover Can Turn Your Losses Into Practice
Marvel Tōkon's replay system has another feature that is particularly useful for learning. During a replay, you can take control of either player and recreate the situation from the point where you took over, then experiment with different responses instead of simply watching yourself lose.
This is an excellent habit to develop. Lost because someone kept jumping at you? Take control of the replay and test your Down Heavy. Lost because you could not escape their pressure? Recreate the situation and experiment with your Assemble defensive options. Dropped a combo? Take control and figure out where the route actually breaks.
Instead of asking "why did I lose," you can ask "what could I have done differently here." That is a much more useful question.
Character Lessons Are Worth Completing
Once you have picked a character, do not completely ignore their character-specific challenges. Beyond the game's basic tutorials and combo trials, Marvel Tōkon includes character-specific missions that give you goals rather than simply asking you to perform a particular sequence, involving damage requirements, combo objectives, or other restrictions built around the character.
They are useful because they force you to experiment. You might discover a combo starter you would not normally use, learn how your character converts a particular hit into damage, or finally understand why a particular mechanic exists. Once you have finished experimenting there, your dedicated character guide can take you further.
Do Not Ignore the Single-Player Content
Marvel Tōkon's single-player modes are not just there to fill out the menu. Episode modes, Survival, character lessons, Action Checks, and Combo Trials all have gameplay or unlock-related value.
Different colors can be unlocked through gameplay activities, including Episode Mode, online matches, Survival, and character-specific challenges, and the game's Champion character is also unlocked through completing an Episode Mode.
You do not need to chase every unlock immediately, but if you are spending all your time bouncing between online matches and wondering how to improve, some of these modes provide a much more controlled environment for learning.
Check the Quick Menu
One final quality-of-life tip is easy to overlook. The main menu's Quick Menu gives you shortcuts to frequently used areas, and you can customize some of the options along the bottom row. One of those shortcuts can take you directly into Quick Training using your selected battle settings.
That sounds minor, but once you start using Training Mode regularly, cutting out a pile of menu navigation is surprisingly convenient. You can also manage your registered teams through the team-building options, making it easier to switch between different team setups without rebuilding them from scratch.
The Best Way to Learn Marvel Tōkon
The biggest mistake you can make with Marvel Tōkon is trying to learn everything simultaneously. You do not need to understand every assist interaction, every combo route, every defensive mechanic, and every character-specific gimmick before you play your first online match.
Instead, build your knowledge in layers. Start with one character, learn their basic attacks and Unique ability, and understand their preferred range. Learn which assist you want from your team, practice one simple combo, and learn Down Heavy as your anti-air. Understand how your Assemble Gauge works, then start experimenting with tagging, Raw Tags, Assemble attacks, mix-ups, and longer combos.
When you lose, use Training Mode or Replay Takeover to investigate why. And when you are ready to move beyond the basics, dive into your character's dedicated guide for more advanced mechanics, combos, assists, and team-building ideas.
Marvel Tōkon gives you a huge amount of freedom once its systems start to click. You can use assists to extend combos, tag into an attacking teammate, manage the combo gauge, create pressure from unexpected angles, and build teams around interactions that are not obvious when you first start playing. You do not need to master that freedom immediately. Learn one system at a time, and let the chaos come later.
Beginner Guide FAQ
What is the difference between the Super Meter and the Assemble Gauge?
The Super Meter powers enhanced moves, 50-meter and 100-meter supers, and the Tōkon Assemble attack. The Assemble Gauge powers assists along with universal offensive and defensive mechanics like the Assemble Attack, the back dash, and Crossover Reflect.
How do I unlock my full team during a round?
Mainly through wall interactions. Throwing an opponent into a wall, knocking them into one with another move, or sending them through a stage transition unlocks additional teammates and raises your maximum Super Meter and Assemble Gauge. Losing a round can also unlock a character as a comeback mechanic.
Are Quick Skills worth using instead of traditional inputs?
Yes, especially early on. Quick Skills deal slightly less damage than their full-input versions, but they are far more consistent, which matters more than the damage difference while you are still learning the game.
What is Raw Tag?
Raw Tag lets you switch characters without calling an assist. There is a small delay before the incoming character takes control, and that delay can be exploited so the outgoing character keeps acting while the swap happens.
How do I get better at defense in Marvel Tōkon?
Learn Down Heavy as your universal anti-air, understand your Assemble back dash and Crossover Reflect, and practice recovering after getting launched. Training Mode and Replay Takeover are the fastest ways to figure out exactly what beat you.
Key Takeaways
- You only start with two characters unlocked, wall interactions bring in the rest of your team.
- The Super Meter and Assemble Gauge serve different purposes, learn to manage both separately.
- Assists cost Assemble Gauge, do not spend it just because it is available.
- Down Heavy is your universal anti-air against jumping opponents.
- Test your assist follow-ups in Training Mode instead of assuming you are safe.
- Replay Takeover and character lessons are some of the fastest ways to actually improve.
Final Thoughts
Marvel Tōkon: Fighting Souls rewards players who build their knowledge in layers instead of trying to absorb every system at once. Start with one character, learn the universal mechanics covered here, and lean on Training Mode and Replay Takeover whenever something does not make sense.
Looking for help with a specific character? Head over to the Marvel Tōkon: Fighting Souls Guide Hub for our complete collection of character guides, beginner recommendations, playstyle breakdowns, mechanics, combos, and post-launch strategy resources. As Marvel Tōkon continues to evolve, we'll keep expanding the hub with new characters, mechanics, team-building advice, and advanced guides.