
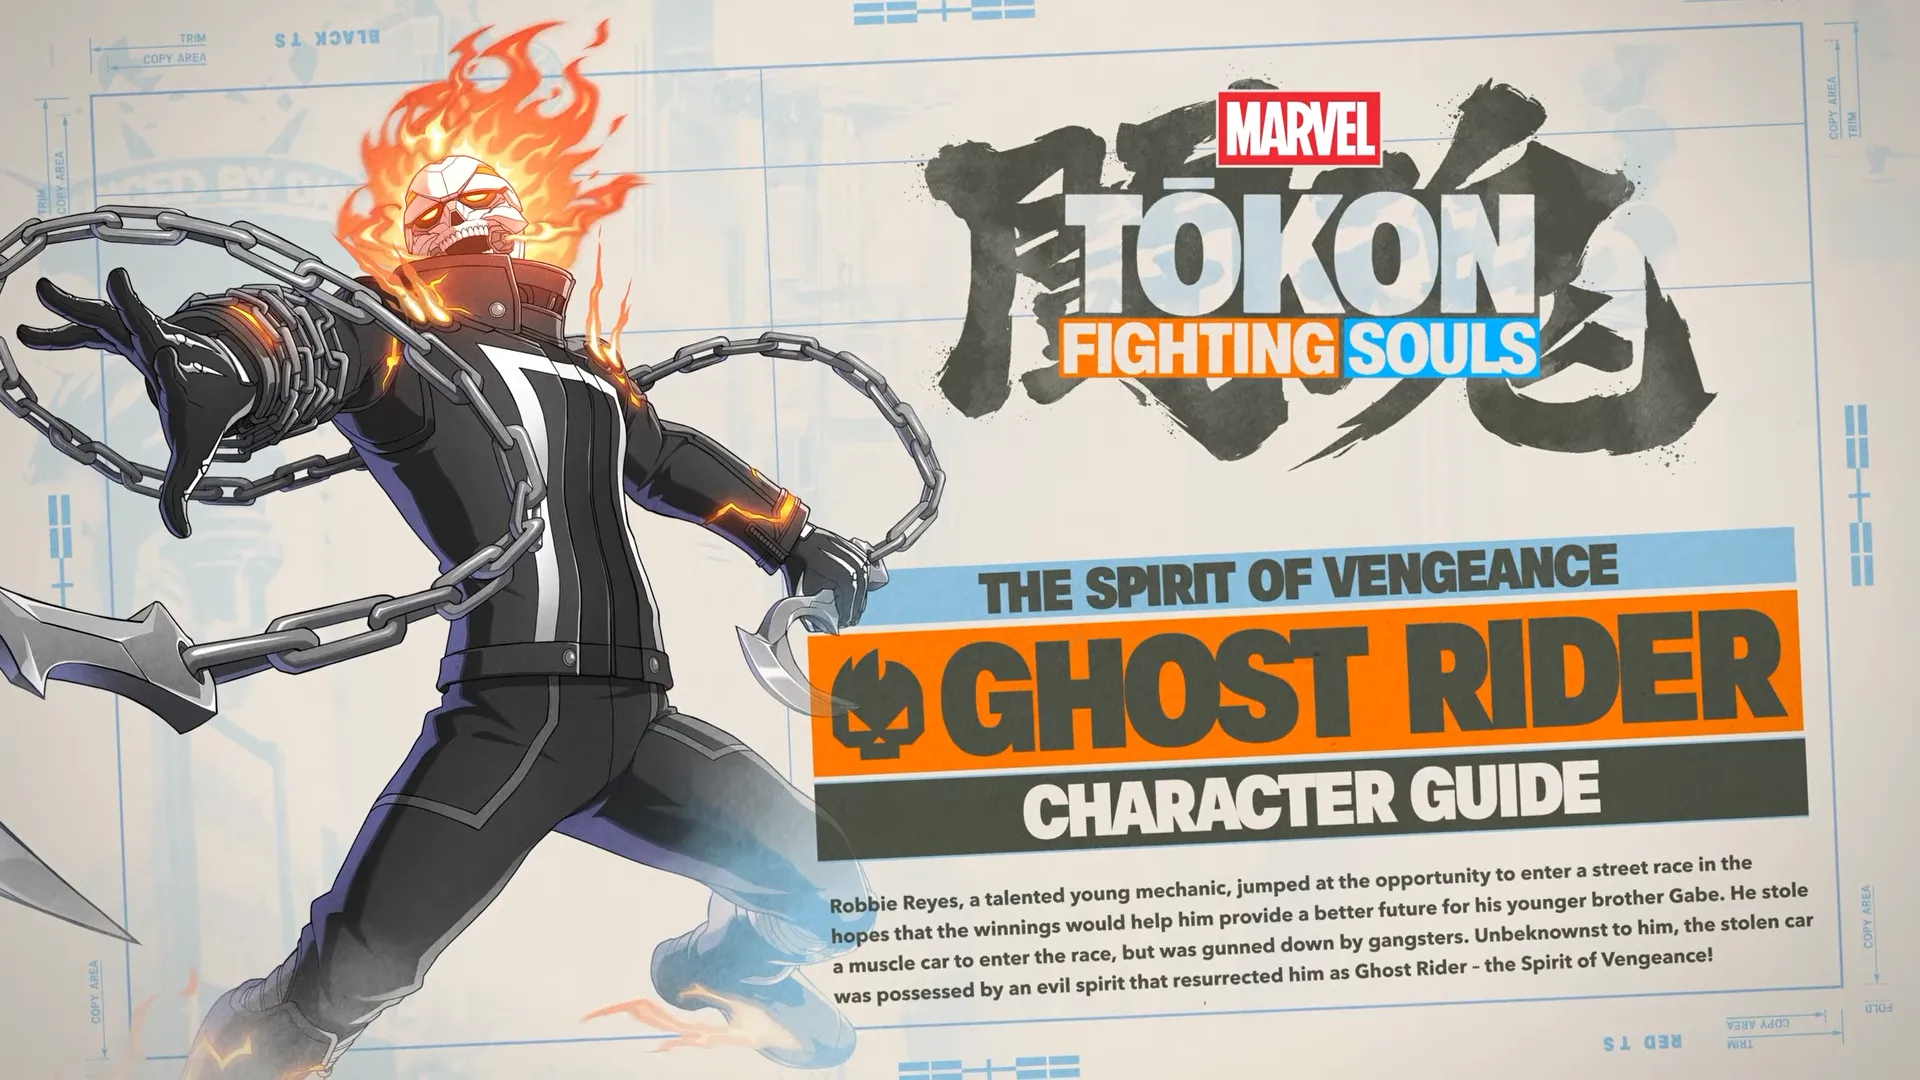
Ghost Rider is one of the most unique characters in Marvel Tōkon: Fighting Souls. While many fighters focus on simple resource management, Ghost Rider constantly balances offense against his own Vengeance Gauge. The more aggressively he spends that resource, the stronger his attacks become, but letting the gauge fill all the way leaves him vulnerable to Overheat, which temporarily shuts down many of his strongest options.
Armed with long-reaching chain attacks, powerful flame-based specials, strong screen control, and devastating cinematic finishers, Ghost Rider is built to control space and punish opponents who make careless mistakes. Mastering him isn't just about landing combos. It's about knowing when to build Vengeance, when to spend it, and how to avoid getting caught in an Overheat at the worst possible moment.
Here's everything you need to know about playing Ghost Rider in Marvel Tōkon: Fighting Souls.
Ghost Rider Overview
| Attribute | Details |
|---|---|
| Ease of Use | ★★ |
| Archetype | Mid-range Control / Resource Management |
| Strengths | Long-range normals, powerful specials, strong stage control, high damage during Red Zone |
| Weaknesses | Requires careful Vengeance Gauge management, vulnerable during Overheat |
Ghost Rider rewards players who enjoy controlling the pace of a fight rather than constantly rushing their opponent. His chains let him pressure enemies from surprising distances, while his flame attacks force opponents to respect the space around him.
Unlike most characters, Ghost Rider gets progressively stronger as his Vengeance Gauge rises. Several Skills gain additional hits, improved properties, or increased damage at higher gauge levels. However, that comes with an important drawback: if the gauge reaches its maximum capacity, Ghost Rider enters Overheat, briefly unable to move or use his Skills.
That constant risk-and-reward mechanic gives Ghost Rider one of the highest skill ceilings in Marvel Tōkon: Fighting Souls.
Ghost Rider Playstyle
Ghost Rider thrives in the mid-range, where his chains and fire attacks keep opponents at arm's length.
Instead of overwhelming enemies with relentless rushdown, he slowly builds pressure through repeated pokes, long-reaching Skills, and careful management of his Vengeance Gauge. Once he reaches Red Zone, many of his attacks become significantly more dangerous, letting him convert openings into explosive damage.
The challenge is avoiding greed.
Staying in Red Zone too long causes the Vengeance Gauge to overflow into Overheat, leaving Ghost Rider completely exposed. Strong Ghost Rider players constantly spend portions of the gauge through Skills, Super Skills, and Ultimate Skills before the meter maxes out.
If you enjoy characters that reward planning and resource management, Ghost Rider is one of the most satisfying fighters on the roster.
Understanding the Vengeance Gauge
The Vengeance Gauge is Ghost Rider's signature mechanic, and it influences nearly every part of his moveset.
Unlike a traditional resource that simply fills and stays available, Ghost Rider's gauge constantly shifts between different power levels.
Zone 1 (White)
Ghost Rider begins each round in Zone 1.
Most of his attacks function normally here, and it's generally the safest state to play in. Several Skills begin building the gauge while also letting Ghost Rider establish space and pressure.
Zone 1 is ideal for learning his neutral game before moving into stronger offensive sequences.
Zone 2 (Yellow)
As Ghost Rider keeps landing Skills, the Vengeance Gauge climbs into Zone 2.
Several attacks start gaining improved properties, including additional hits and increased damage. At this point, Ghost Rider becomes much more threatening while still staying relatively safe from Overheat.
Zone 2 is often the sweet spot for sustained offense, since it offers stronger attacks without the immediate danger of maxing the gauge.
Red Zone
Once the gauge reaches Red Zone, Ghost Rider unlocks his most dangerous state.
Many of his Skills get stronger regardless of button strength, dealing increased damage or adding extra hits. Certain attacks also gain new properties that make combo extensions and pressure significantly more effective.
Red Zone is Ghost Rider at his strongest.
However, every second spent there brings him closer to disaster.
Overheat
If the Vengeance Gauge reaches its maximum capacity, Ghost Rider immediately enters Overheat.
During Overheat:
- Ghost Rider cannot move for a short period.
- Skills become unavailable.
- The Vengeance Gauge must naturally return to Zone 1 before he regains full control.
Against experienced opponents, entering Overheat often means giving away your turn, or even losing an entire combo.
Because of this, managing the Vengeance Gauge matters far more than simply trying to keep it full.
Best Ways to Manage the Gauge
The safest way to play Ghost Rider is to treat the Vengeance Gauge as a resource that should constantly flow rather than sit full.
Several Unique moves, Skills, Super Skills, and Ultimate Skills naturally consume portions of the gauge. Instead of saving these attacks only for maximum damage, use them strategically to avoid entering Overheat.
Inferno Engine and Eternal Damnation are especially valuable here, since they both consume part of the Vengeance Gauge while also dealing heavy damage.
The goal isn't to stay in Red Zone forever. It's to spend just enough of the gauge to stay powerful without crossing into Overheat.
Normal Attacks
Like every character in Marvel Tōkon: Fighting Souls, Ghost Rider has standing, crouching, and aerial versions of his Light, Medium, and Heavy attacks. His Heavy attacks also have aerial variations, giving him multiple ways to pressure opponents from different angles.
The command list doesn't reveal exact frame data, but Ghost Rider's attack animations clearly emphasize range over speed. His chains let him threaten opponents from farther away than most of the roster, making his normals reliable tools for controlling neutral.
Players should rely on quick Light attacks to interrupt pressure, Medium attacks to start confirms, and Heavy attacks whenever they want to push opponents farther away or begin larger combo routes.
Because Ghost Rider naturally excels at mid-range combat, his normals work best when you're constantly forcing opponents to approach on your terms rather than chasing them across the stage.
Link Attacks
Ghost Rider's Link Attacks function much like the rest of the roster, chaining together Light, Medium, and Heavy normals into longer offensive sequences.
You can perform a Link Attack by inputting a succession of Light, Medium, or Heavy attacks, or by combining standing and crouching versions of those buttons.
These strings form the foundation of nearly every combo you'll perform.
Many of Ghost Rider's stronger options can also be activated directly from Link Attacks, letting you transition into Skills, Super Skills, Ultimate Skills, or Tōkon Assemble without returning to neutral.
Learning which Link Attack routes naturally connect into his special moves is one of the first steps toward maximizing his damage.
Revelator Chain
Input: Unique
Revelator Chain is one of Ghost Rider's defining Unique attacks.
Ghost Rider swings his chains in a rapid series of attacks that can be extended simply by holding the button. The longer you hold the input, the more strikes the move performs before ending.
Unlike many extended attacks, Revelator Chain comes with an important tradeoff: each additional strike consumes part of the Vengeance Gauge.
While that means you can't abuse the attack indefinitely, it also gives you a reliable way to keep the gauge from reaching Overheat during longer offensive sequences. Revelator Chain works well as both a pressure tool and a gauge management option, making it one of Ghost Rider's most versatile Unique moves.
Hell Throttle
Input: Forward + Unique
Hell Throttle surrounds Ghost Rider in hellfire, damaging opponents in the area around him.
Although it functions as an offensive attack, one of its biggest advantages is that it significantly reduces the Vengeance Gauge after use.
That creates an interesting decision for Ghost Rider players. Do you keep building pressure and risk entering Overheat, or cash out some of your Vengeance Gauge with Hell Throttle to stay in control?
Because the move hits all around Ghost Rider, it can also discourage overly aggressive opponents from staying close for too long. When you're approaching the upper end of Red Zone, Hell Throttle becomes one of your safest tools for keeping the gauge under control while still maintaining offensive momentum.
Hell Fire
Input: Quarter Circle + Skill
Hell Fire is Ghost Rider's primary flame projectile.
The grounded version breathes hellfire directly in front of him, while the aerial version changes the angle of the attack, letting Ghost Rider threaten airborne opponents or attack from above.
Using Hell Fire also increases the Vengeance Gauge, making it one of Ghost Rider's primary tools for building toward stronger damage states. As he progresses through higher Vengeance Gauge levels, Hell Fire gains additional hits, making it increasingly rewarding during longer pressure sequences. Zone 1 and Zone 2 versions consume 25 Skill Gauge, so players should balance offensive pressure against resource availability.
Hell Fire excels in several situations:
- Controlling space against advancing opponents.
- Catching aerial approaches with the jumping version.
- Building Vengeance Gauge from a safe distance.
- Extending combos once additional hits become available.
Because Ghost Rider naturally wants opponents to respect his mid-range, Hell Fire fits perfectly into his overall game plan.
Penance Driver
Input: Half Circle Forward + Skill
Penance Driver summons Ghost Rider's iconic Hell Ride after successfully grabbing the opponent.
Unlike many command grabs, this move carries an interesting risk-versus-reward mechanic. Landing the grab reduces the Vengeance Gauge, helping Ghost Rider avoid Overheat while dealing solid damage. However, if the move misses, the gauge actually increases instead.
As Ghost Rider reaches higher Vengeance Gauge levels, Penance Driver also gains additional damage, making successful grabs even more rewarding during Zone 2 and Red Zone. Because opponents know how dangerous this move can become, it naturally forces defensive players to think twice before simply standing still and blocking. Mixing it into your offense after conditioning opponents with chain attacks and flame pressure can make Ghost Rider considerably harder to defend against.
Judgement Cradle
Input: Quarter Circle Back + Skill
Judgement Cradle is one of Ghost Rider's most versatile offensive Skills.
Ghost Rider swings his chains across a long distance, making it a great tool for punishing opponents who try to play outside his immediate range. The final strike triggers the Break effect, giving Ghost Rider a chance to continue his offense instead of simply ending the combo.
Like several of his Skills, Judgement Cradle gets stronger as the Vengeance Gauge rises, gaining additional hits at higher gauge levels. Zone 1 and Zone 2 versions consume 25 Skill Gauge.
One of the move's biggest strengths is its flexibility. Besides serving as a long-range poke, Judgement Cradle can naturally lead into additional pressure thanks to its unique follow-up mechanic.
Judgement Cradle Additional Input
After performing the grounded version of Judgement Cradle, Ghost Rider can immediately perform an additional input before the final hit. Rather than simply extending the combo, these follow-ups introduce mix-up potential.
Light Follow-up: Functions as a feint, encouraging opponents to react early.
Medium Follow-up: Attacks low, forcing defenders to crouch.
Heavy Follow-up: Strikes overhead, punishing opponents who continue blocking low.
This simple three-way mix-up makes Judgement Cradle far more dangerous than a standard ranged attack. Once opponents start respecting the initial chain swing, Ghost Rider can repeatedly challenge their defensive habits with different follow-up options.
The Break version can also be activated by pressing Light again at the end of a Light Link Attack, making it even easier to work into regular combo routes.
Hell Scorcher
Input: Quarter Circle Forward + Light
Hell Scorcher summons pillars of hellfire at different positions depending on the version used. Each strength serves a different purpose:
Light Version: Creates flames at mid-range.
Medium Version: Places flames farther away for long-range control.
Heavy Version: Summons flames directly beneath the opponent's current position.
Red Zone Version: Gains additional power while maintaining its threatening screen coverage.
Zone 1 and Zone 2 versions require 25 Skill Gauge.
Hell Scorcher gives Ghost Rider strong stage control, since opponents must constantly consider where the flames may appear next. Even when it doesn't immediately lead to damage, the move can force opponents into predictable movement, letting Ghost Rider intercept them with chain attacks or Hell Fire. Among his specials, Hell Scorcher is arguably one of his strongest tools for controlling neutral.
Assist Types
Ghost Rider offers three Assist options that complement different team compositions.
Assembly Assist Vertical
Ghost Rider leaps upward while swinging his chains vertically. This assist works well against airborne opponents and characters that frequently approach from above. If the attack connects, a Member Switch can be performed immediately afterward, letting your partner continue the combo.
Assembly Assist Aerial
Ghost Rider enters from above and breathes hellfire downward. This version is especially useful for covering aerial space or interrupting opponents trying to jump over your pressure. You can also choose which ally appears when performing this Assembly Assist, adding extra flexibility during team compositions.
Assembly Rush
Assembly Rush sends Ghost Rider lunging forward while attacking. Because of its forward movement, this is the most aggressive of the three assists and works well for extending pressure or converting stray hits into longer combos. Like his other assists, a successful hit immediately enables a Member Switch to continue the offense.
Choosing between Ghost Rider's assists largely depends on your team's needs. Vertical offers anti-air coverage, Aerial controls the skies, while Rush provides the strongest offensive extension.
Super Skill: Inferno Engine
Skill Gauge Cost: 50
Inferno Engine is Ghost Rider's Super Skill. He summons his iconic Hell Charger before launching it directly into the opponent for a cinematic attack that deals heavy damage.
Besides serving as a powerful combo finisher, Inferno Engine also consumes part of the Vengeance Gauge, which makes it particularly valuable whenever Ghost Rider is approaching Overheat — you get damage and gauge management in the same move.
The move can be activated from neutral or by pressing Medium an additional time after a Medium Link Attack, making it easy to work into standard combo routes. Whenever you have 50 Skill Gauge available, Inferno Engine is one of Ghost Rider's safest ways to convert momentum into meaningful damage without risking Overheat.
Ultimate Skill: Eternal Damnation
Skill Gauge Cost: 100
Eternal Damnation is Ghost Rider's Ultimate Skill. He lashes forward with his blazing chains, drawing the opponent toward him. At maximum range, the attack transitions into a cinematic throw before finishing with an explosive follow-up involving his Hell Charger.
Like Inferno Engine, Eternal Damnation also reduces the Vengeance Gauge after use, making it another reliable tool for preventing Overheat during extended offensive sequences.
The Ultimate can be activated from neutral or by pressing Heavy again after a Heavy Link Attack. Players can also hold the directional input during the Heavy Link Attack to perform an EX move before transitioning directly into the Ultimate. With its high damage and built-in gauge management, Eternal Damnation is one of Ghost Rider's strongest ways to end a successful combo.
Tōkon Assemble
Skill Gauge Cost: 150
Ghost Rider's Tōkon Assemble is reserved for clutch situations. This cinematic attack begins with an invincible strike before unleashing a devastating sequence that involves the entire team. Like every Tōkon Assemble in Marvel Tōkon: Fighting Souls, it can only be activated when losing the current round would end the match.
The move can be performed from neutral or by pressing Light again after a Light Link Attack. Because of its invincibility and enormous damage potential, Tōkon Assemble can completely swing the momentum of a match when used at the right moment.
Best Tips for Playing Ghost Rider
Ghost Rider's greatest strength isn't simply dealing damage. It's managing momentum through the Vengeance Gauge. Here are a few tips to help you get started:
- Don't chase Red Zone unnecessarily. It's Ghost Rider's strongest state, but staying there too long dramatically increases the risk of Overheat.
- Always watch your gauge during combos. If it's getting close to maximum, consider ending your sequence with Inferno Engine or Eternal Damnation to safely reduce it.
- Use Hell Scorcher to control movement. The different versions let you threaten multiple areas of the stage and force predictable approaches.
- Mix Judgement Cradle follow-ups. Alternate between lows, overheads, and feints so opponents can't simply block one option every time.
- Take advantage of your reach. Ghost Rider performs best when opponents struggle to get close, so let your chains do the work instead of constantly rushing forward.
- Don't fear spending resources. Ghost Rider is built around continuously building and spending both Skill Gauge and Vengeance Gauge. Hoarding them often leads to Overheat and missed opportunities.
Final Thoughts
Strengths: Long-range normals, powerful specials, strong stage control, high damage during Red Zone, and one of the highest skill ceilings on the roster.
Weaknesses: Requires careful Vengeance Gauge management, vulnerable during Overheat, and unforgiving for players who try to play him on autopilot.
Ghost Rider is one of Marvel Tōkon: Fighting Souls' most rewarding technical characters. His mix of long-range pressure, powerful flame attacks, and the Vengeance Gauge gives him a playstyle unlike anyone else currently on the roster. Players willing to manage that resource carefully are rewarded with stronger Skills, explosive damage in Red Zone, and some of the game's most satisfying combo finishers.
If you enjoy methodical fighters who dominate space, control the pace of a match, and reward smart resource management, Ghost Rider is a great character to master in Marvel Tōkon: Fighting Souls.
Explore more Marvel Tōkon: Fighting Souls character guides in our Marvel Tōkon Guide Hub.
Note: This guide is based on Arc System Works' official Ghost Rider character guide and currently available gameplay footage. We'll continue updating it as Marvel Tōkon: Fighting Souls receives balance changes, new discoveries, and additional competitive strategies after launch.